
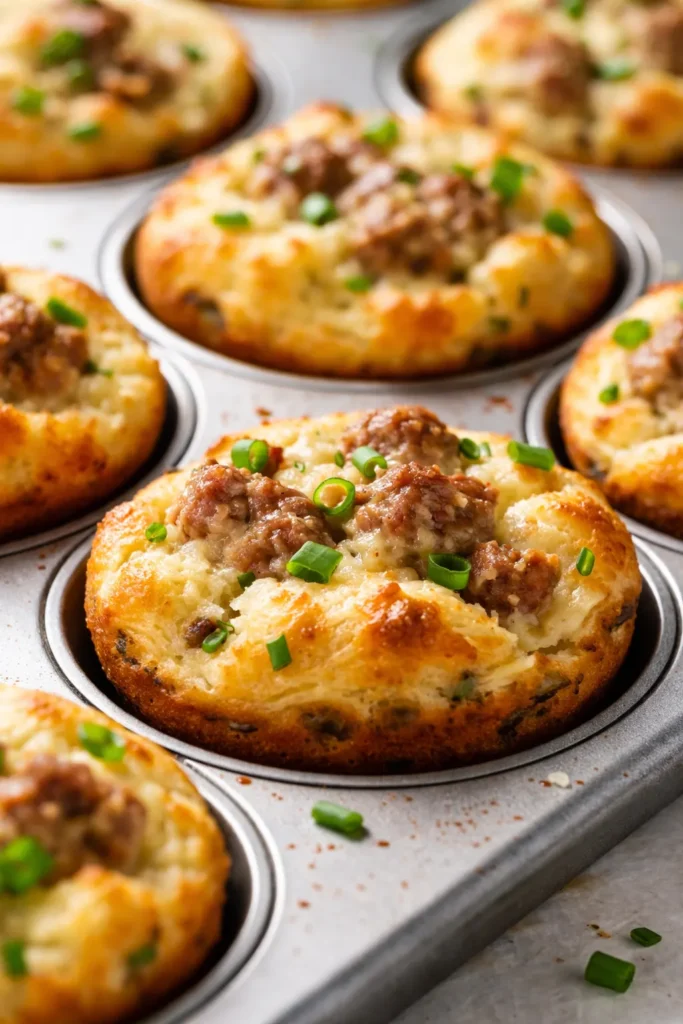
The first time I pulled a batch of these out of the oven, the kitchen smelled exactly like Sunday morning — but it was a Tuesday, I was running late, and my kids were circling like hungry wolves. One bite in and my youngest looked up and said, “Can we have these every morning?” That was three years ago and I’ve been making a double batch every Sunday ever since.
The short version: Fluffy pancake cups filled with savory sausage and a touch of maple, baked in a muffin tin. Fifteen minutes hands-on, breakfast ready in half an hour.
I’ve tested this recipe about forty times to get the balance just right — not too dense like a muffin, not too fragile like a pancake, with just enough sausage in every bite that nobody fights for the “good ones” at the bottom of the basket.
- Serves: 12 muffins (4–6 as a meal with sides)
- Hands-On Time: 15 min | Total Time: 30 min
- Difficulty: Easy enough for a school morning
- Cost per serving: ~$1 per muffin
- Calories: ~210 per muffin
- Dietary Notes: Can be made dairy-free or gluten-free
(Photo above: overhead shot of a dozen golden-brown pancake muffins in a standard muffin tin, one broken open to show the crumbly texture and scattered bits of browned sausage, with a small ramekin of warm maple syrup beside it on a worn wooden cutting board. Natural morning light from the left.)
Why These Work When So Many Breakfast Muffins Disappoint
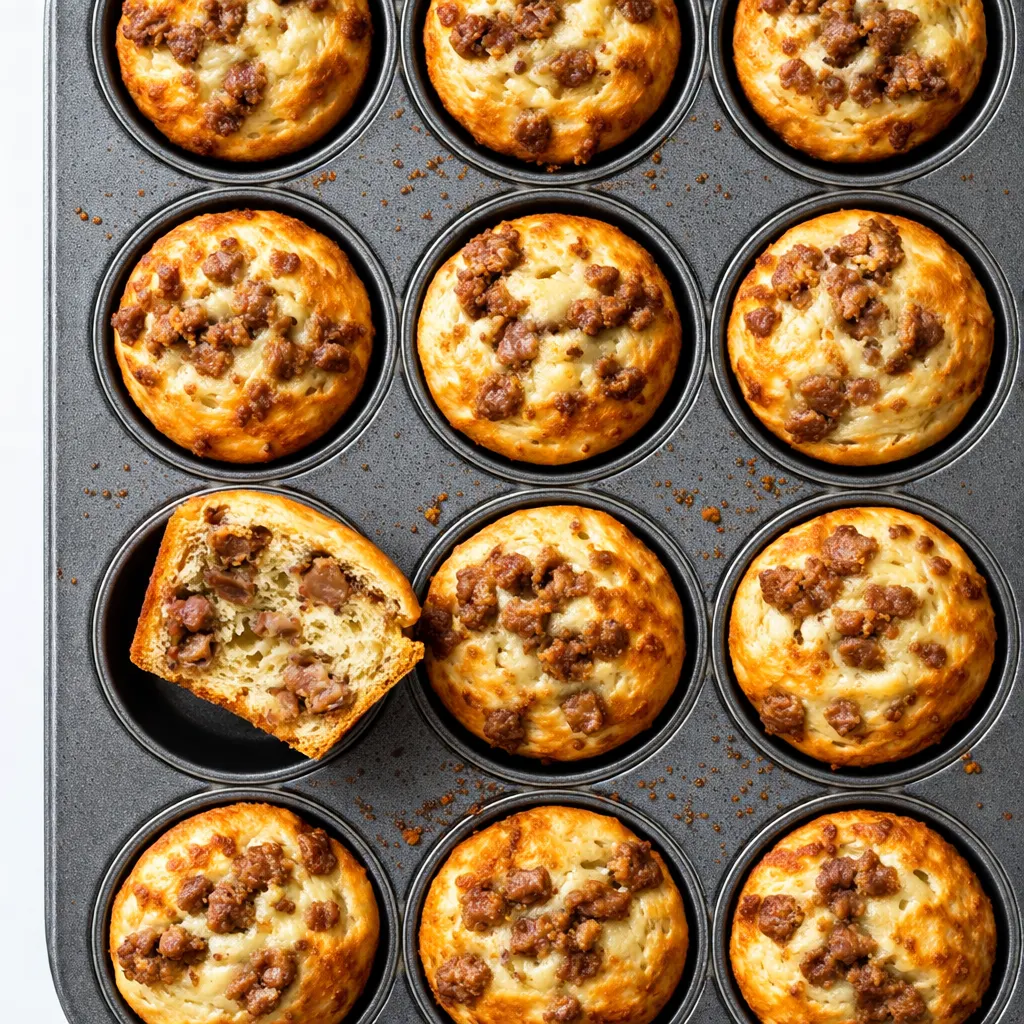
The secret is the batter-to-sausage ratio. Most versions either have so much batter the sausage disappears into a bland pancake, or they go heavy on the sausage and the whole thing falls apart when you take a bite. My version lands right in the middle — every muffin holds together beautifully, but you get pockets of crispy, savory sausage in almost every forkful.
The second trick is how you treat the batter. You’re looking for something closer to a thin pancake batter than a thick muffin batter. That looseness is what keeps these light and tender instead of dense and bready. I learned this the hard way — my first six batches were basically hockey pucks with sausage inside.
And the maple syrup isn’t just for drizzling at the end. A small amount goes into the batter itself. It doesn’t make them sweet like a dessert — it just rounds out the savory edges and keeps the pancakes from tasting flat. My husband thought I was crazy until he tasted the version without it. He never said “I told you so,” but I could see it in his smug morning face.
Everything You Need (Plus a Few Honest Notes)
- 1 ½ cups self-rising flour: If you don’t have self-rising, use 1 ½ cups all-purpose plus 2 tsp baking powder and ¼ tsp salt. I’ve done both and honestly can’t tell the difference. Tip: Make sure your baking powder isn’t older than six months — stale baking powder is the #1 reason these don’t rise.
- ¾ cup whole milk: Room temperature if you remember, straight from the fridge if you don’t. I’ve used oat milk and 2% both with good results. My kids can’t tell the difference between whole and oat, so I use whatever’s in the fridge.
- 1 large egg: Same deal — room temp is ideal but not mandatory. If you’re in a rush, run the egg under warm tap water for 30 seconds before cracking.
- 2 tbsp melted butter: Plus a little extra for greasing the tin. Coconut oil works great here too.
- 2 tbsp maple syrup: The real stuff, not pancake syrup. This is the quiet hero ingredient.
- 1 cup cooked crumbled breakfast sausage: About 6 oz. I use regular pork sausage but turkey works too. I brown the sausage the night before and keep it in the fridge — it makes morning assembly about 90 seconds faster.
- Optional mix-ins: 2 tbsp chopped chives or green onion, ¼ cup shredded cheddar cheese. Both are excellent but neither is required.
What to Pull Out Before You Start
- Standard 12-cup muffin tin — nonstick is best but any will work with good greasing
- Medium mixing bowl and whisk
- 2-cup liquid measuring cup for the milk
- Spatula or large spoon for folding
- Cookie scoop or ¼ cup measure for filling the cups
That’s it. No stand mixer, no food processor, no special tools. The muffin tin does all the heavy lifting.
Let’s Make It — Step by Step
This moves fast once you start mixing, so I like to have everything measured and the oven preheated before I get going. Read through once and you’re golden.
Preheat and prep the pan: Set your oven to 400°F. Grease your muffin tin well — butter works, nonstick spray works, even a swipe of oil with a paper towel works. I use butter because it makes the edges extra golden.
- Mix the dry ingredients: In a medium bowl, whisk the self-rising flour to aerate it a bit. If you’re using the all-purpose + baking powder version, whisk the flour, baking powder, and salt together. (📸 Photo tip: The flour should look light and slightly fluffy, not packed down — that means you’ve aerated it enough.)
- Combine the wet ingredients: In the measuring cup, whisk together the milk, egg, melted butter, and maple syrup until smooth. The butter will try to separate — just whisk until it’s incorporated, even if it looks a little speckled.
- Make the batter: Pour the wet ingredients into the dry and stir gently with the spatula. Stir only until there are no more streaks of flour — lumps are your friend here. Overmixing makes them tough and I’ve ruined more than a few batches this way.
- Fold in the sausage: Add the crumbled sausage and any optional mix-ins. Fold 3 or 4 times, just until the sausage is evenly distributed. You want pockets of meat, not a homogeneous sausage paste. (📸 Photo tip: The batter at this point should look lumpy and a little ragged, with visible bits of sausage scattered through — not a smooth, uniform mix.)
- Fill the cups: Divide the batter evenly among the 12 muffin cups. Each cup should be about ¾ full. A cookie scoop makes this so much easier and less messy. Don’t overfill — these do rise and you want them to stay inside the cup.
- Bake until golden: Bake for 12–14 minutes at 400°F. At the 10-minute mark, rotate the pan. You’re looking for the edges to be golden brown and the tops to spring back when you press them gently with a finger. A toothpick inserted in the center of a muffin should come out clean, but one or two moist crumbs is fine — they continue cooking in the pan for a minute.
- Cool and release: Let the muffins rest in the pan for exactly 3 minutes — no more, no less. Too short and they stick. Too long and the bottoms steam and get soggy. Run a butter knife around the edges and pop them out onto a wire rack. If any stick, you didn’t grease enough, and that’s okay — just use a fork to coax them out.
How I Meal Prep These for the Week
A double batch on Sunday takes me about 25 minutes total, and we’re set until Wednesday at least. I make the full recipe as written, let them cool completely, and then portion them into zip-top bags labeled by day. My middle schooler can grab one, microwave it for 20 seconds, and be out the door without me having to stand over the stove.
- Fridge: In an airtight container for up to 5 days. Put a paper towel in the bottom to absorb moisture — I change it out after day 2.
- Freezer: Yes! Let cool completely, then arrange in a single layer on a baking sheet and freeze for 1 hour. Transfer to a freezer bag. They keep for 3 months.
- Reheat: Microwave for 20–30 seconds from fridge, or 45–60 seconds from frozen. If you have an extra minute, the toaster oven at 300°F for 5 minutes brings back the crispy edges. The microwave is fine but the toaster oven is where it’s at for that just-baked feel.
Things I Wish I’d Known the First 6 Times I Made These
- Don’t overmix the batter. Seriously. I know every recipe says this. I ignored it for years on principle. Then I made two batches side by side — one gently folded, one vigorously stirred — and the difference was unmistakable. The overmixed version was tough and almost rubbery. The gently folded one was fluffy and tender. Fold until the flour disappears and stop. Your arm will feel like it’s barely done anything and that’s exactly right.
- Pre-cook and cool your sausage completely. If you use hot sausage straight from the pan, it will continue cooking in the muffin and create steam pockets that make the texture irregular. Worse, if the sausage is greasy, it can make the bottoms of the muffins soggy. I brown mine the night before and let it sit in the fridge uncovered so any excess fat solidifies and I can scrape it off.
- Don’t overfill the cups. I know — 12 muffins exactly filling 12 cups looks so satisfying. Fill them three-quarters full at most. These rise more than you expect and an overflowed muffin is a sad, lopsided thing that doesn’t cook evenly. Trust me, I’ve made volcano muffins more times than I’m proud of.
- The 3-minute rest is non-negotiable. I timed this. At 2 minutes they stick. At 5 minutes the bottoms get steamed and lose their golden crust. At exactly 3 minutes they slide right out with a butter knife. Set a timer. Don’t guess.
- Even if you mess something up, they’ll still be good. I overmixed a batch last month, my oven temp was off, and I forgot the maple syrup. My kids ate them in about 4 minutes flat and asked for more. So don’t stress — these are very forgiving.
Swaps That Actually Work
- Dairy-Free: Use oat milk or almond milk (unsweetened) and melted coconut oil or vegan butter instead of regular butter. Works perfectly — I make this version for my nephew who can’t do dairy and he asks for seconds every time.
- Gluten-Free: Cup-for-cup gluten-free flour blend (like Bob’s Red Mill 1:1) works well. Add an extra tablespoon of milk because gluten-free flour absorbs more liquid. The texture is slightly more delicate but still holds together beautifully.
- Turkey or Chicken Sausage: Use fully cooked breakfast links, crumbled. Turkey sausage is leaner so the muffins will be slightly less rich, but they’re still delicious. Add a teaspoon of olive oil to the batter if you want to compensate for the missing fat.
- Add Some Sweetness: For a sweeter version, add 2 tbsp brown sugar to the dry ingredients and swap the sausage for a handful of blueberries. My kids call these “blueberry clouds” and they disappear faster than the savory version.
- Cheese Lover’s Version: Fold in ½ cup shredded sharp cheddar with the sausage. The cheese melts into the top and creates crispy little edges that are, I’m not exaggerating, the best part of the entire muffin.
Questions I Get About This Recipe All the Time
Q: Why did my muffins turn out dense and flat?
A: Ugh, I hate when that happens. Most likely one of three things: your baking powder is old, you overmixed the batter, or your oven wasn’t hot enough. Check the date on your baking powder (replace if older than 6 months), stir gently next time, and make sure your oven is fully preheated to 400°F. You’ve got this next time!
Q: Can I use pancake mix instead of homemade batter?
A: Yes, and I’ve done it in a pinch. Use 1 ½ cups complete pancake mix (the kind that only needs water) and reduce the milk to ½ cup. Skip the extra baking powder and salt. The texture is slightly more cake-like but still very good. When I’m really tired and just need breakfast to happen, this is my move.
Q: How long do these last in the fridge and can I freeze them?
A: They’re good in the fridge for 5 days in an airtight container with a paper towel. Yes, they freeze beautifully — flash freeze on a baking sheet for an hour, then transfer to a freezer bag. They last 3 months in the freezer. To reheat, microwave from frozen for 45–60 seconds or thaw in the fridge overnight and microwave for 20 seconds.
Q: What do you serve with these for a full breakfast?
A: I love them with a side of scrambled eggs and fresh fruit. My kids like to dip them in warm maple syrup, while my husband crushes red pepper flakes on top for a spicy kick. For a weekend brunch table, I set out a bowl of mixed berries and some crispy bacon — the salty-sweet combo is unbeatable.
More Recipes My Family Makes on Repeat
If you liked these sausage pancake muffins, here are a few others that get the same reaction at our table:
- Easy Egg Bites That Taste Like Starbucks — Protein-packed and portable, ready in 20 minutes
- Fluffy Buttermilk Pancakes (No Buttermilk Needed) — The only pancake recipe I use on Saturday mornings
- Make-Ahead Breakfast Burritos That Freeze Perfectly — Grab-and-go with scrambled eggs, cheese, and your choice of fillings
These sausage pancake muffins have become our weekday breakfast standard for a reason — they’re forgiving, they keep beautifully, and they make even a rushed Tuesday feel a little bit like Sunday morning. If you make them, I’d love to know how they turned out in your kitchen.
Drop a comment below or tag me on Pinterest so I can see your batch. My kids are already asking when I’m making another round.
📌 Save this easy sausage pancake muffins recipe for busy mornings when you need a warm breakfast everyone can grab and go — pin it for your next meal prep Sunday.
Easy Sausage Pancake Muffins That Stay Fluffy for Days
Equipment
- Standard 12-cup muffin tin
- Medium Mixing Bowl
- Whisk
- Spatula or large spoon
- Cookie scoop or 1/4 cup measure
Ingredients
- 1 1/2 cups self-rising flour (or 1 1/2 cups all-purpose + 2 tsp baking powder + 1/4 tsp salt)
- 3/4 cup whole milk (room temp or cold; oat milk or 2% also work)
- 1 large egg (room temp preferred)
- 2 tbsp melted butter (plus extra for greasing tin; coconut oil works)
- 2 tbsp pure maple syrup (not pancake syrup)
- 1 cup cooked crumbled breakfast sausage (about 6 oz; turkey or pork)
Optional mix-ins
- 2 tbsp chopped chives or green onion
- 1/4 cup shredded cheddar cheese
Instructions
- Preheat your oven to 400°F (200°C). Grease a standard 12-cup muffin tin well with butter or nonstick spray.
- In a medium bowl, whisk the self-rising flour to aerate. If using all-purpose + baking powder, whisk flour, baking powder, and salt together.
- In a liquid measuring cup, whisk together milk, egg, melted butter, and maple syrup until smooth. The butter may separate slightly – keep whisking.
- Pour the wet ingredients into the dry and stir gently with a spatula until just combined – lumps are fine. Do not overmix.
- Fold in the crumbled sausage and any optional mix-ins (chives and/or cheese) with 3–4 folds until evenly distributed.
- Divide the batter evenly among the 12 muffin cups, filling each about 3/4 full. Use a cookie scoop for easy filling.
- Bake for 12–14 minutes, rotating the pan halfway through. The edges should be golden and tops spring back when pressed. A toothpick inserted in the center should come out clean or with a few moist crumbs. Let rest in the pan for exactly 3 minutes, then run a knife around the edges and transfer to a wire rack. Serve warm with extra maple syrup if desired.
Notes
Related posts:
 High-Protein Overnight Oats That Actually Taste Like Breakfast (Not a Chalky Disaster)
 The Slow Cooker Cowboy Casserole That Saves Tired Weeknights (No Soggy Tots Allowed)
 Quick Lemon Ricotta Pasta for Busy Weeknights: Creamy, Bright, and on the Table in 20 Minutes
 Lemon Garlic Butter Baked Salmon in Foil That’s Ready in 25 Minutes — No Fuss, No Mess
 Moist Chocolate Zucchini Bread That Doesn’t Turn Out Rubbery — Finally
 Creamy Homemade Strawberry Dole Whip (That Tastes Just Like the Real Thing)