
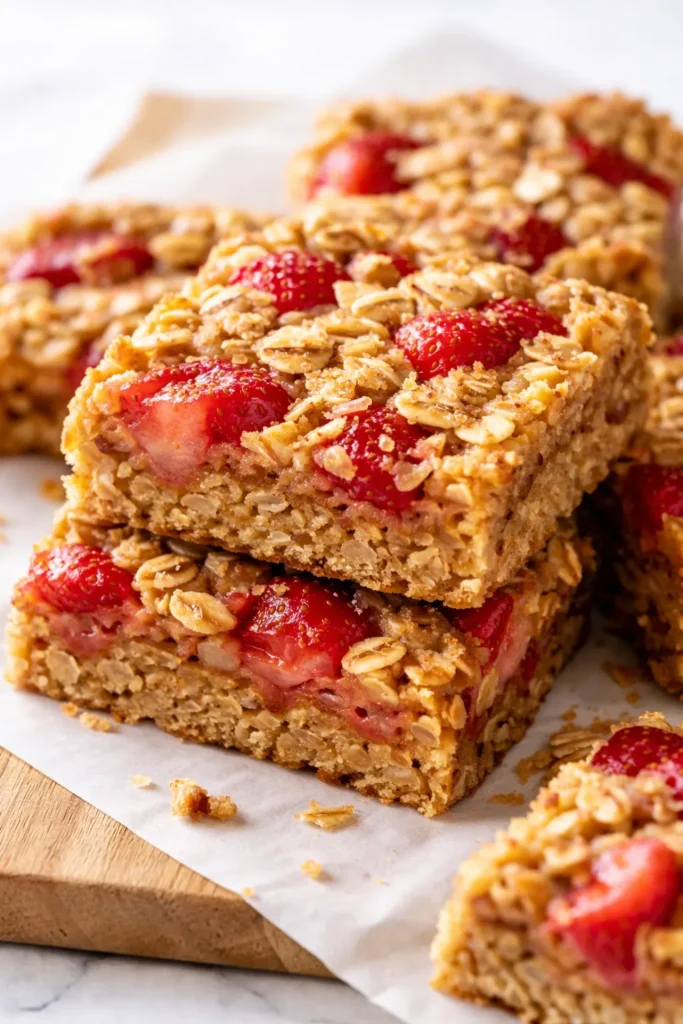
The first time I made these Healthy Strawberry Oatmeal Bars, my daughter Nora ate two before I could get them into the lunchboxes. That’s when I knew I’d finally cracked the code on a bar that’s wholesome enough for breakfast but satisfying enough to feel like a treat. The smell that fills the kitchen when these are baking — sweet strawberries bubbling down into a deep ruby jam, oats toasting to a pale gold on top — is the kind that brings everyone wandering in asking what’s for breakfast.
The short version: Naturally sweetened, whole grain bars with a jammy strawberry center and a buttery oat crumb that actually holds together.
I’ve made this recipe about thirty times now, tweaking the ratios, testing different fruits, and figuring out exactly what keeps the crust from turning to mush. My picky nine-year-old neighbor, Leo, who swears he doesn’t like “healthy stuff,” asked for seconds. That’s when I knew I had to share it with you.
- Serves: 9 bars (as a snack or breakfast)
- Hands-On Time: 15 min | Total Time: 45 min
- Difficulty: Easy — even a beginner baker can nail these
- Cost per serving: ~$0.85
- Calories: ~180 per bar
- Dietary Notes: Naturally sweetened, dairy-free option, can be gluten-free
(Photo above: overhead shot of three oat bars on a worn wooden cutting board, one cut in half to reveal the ruby-red strawberry center, a few oat crumbs scattered around, warm afternoon light coming from the left.)
The Trick to Bars That Hold Together (No Crumbly Mess)
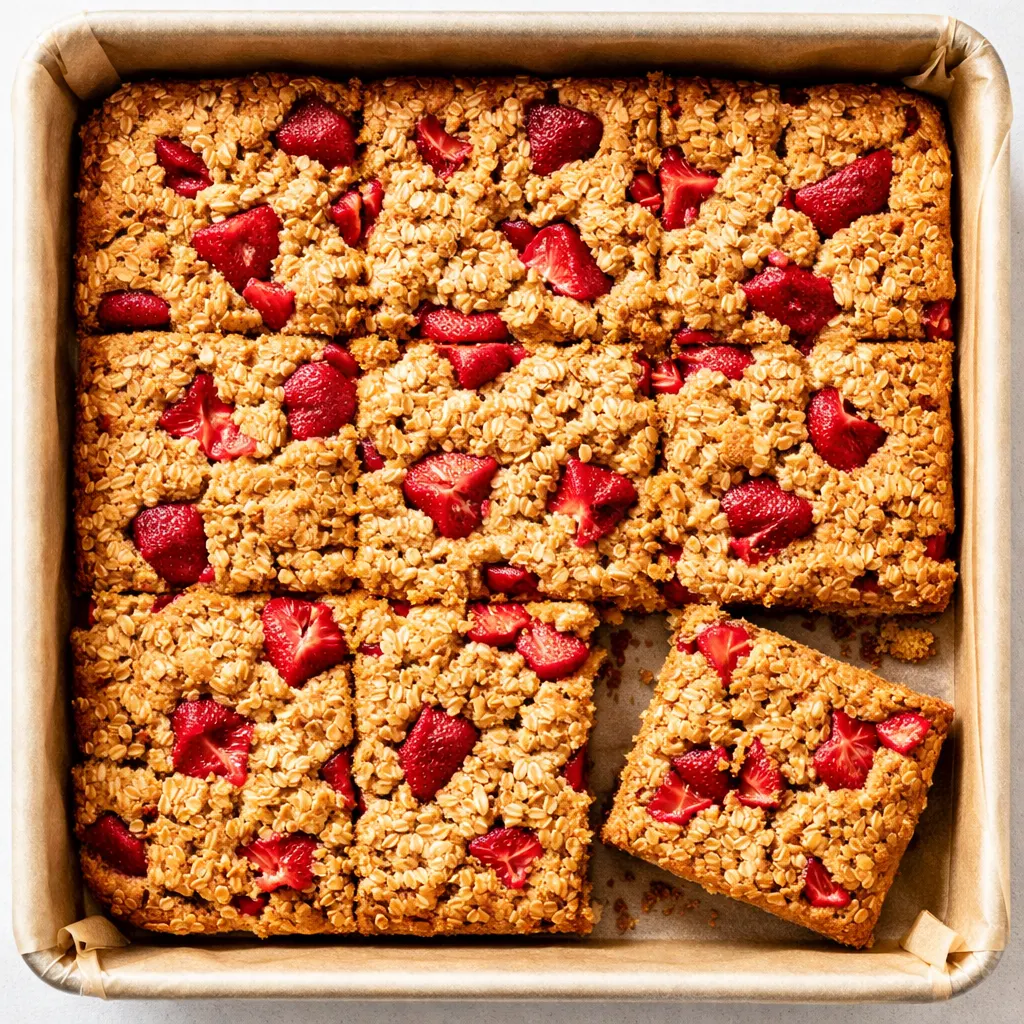
The problem with most healthy oat bars is that they fall apart the second you pick them up. You take one bite and suddenly you’re holding a sad pile of crumbs while the jammy center slides off onto your plate. I’ve been there more times than I care to admit.
Here’s what makes these different: First, I pre-bake the bottom crust for 10 minutes before adding the strawberries. That short head start creates a barrier that keeps the fruit juices from soaking into the oats and turning everything to mush. Second, I toss the strawberries in a little thickener — just a teaspoon of arrowroot or cornstarch — which helps the jam set up firmly instead of running everywhere. And third, I let the bars cool completely in the pan before cutting. I know it’s hard to wait when the whole kitchen smells like this, but that’s when the structure sets. Cut them warm and you’ll be back to crumb city.
Ingredients Worth Talking About
- 1 ½ cups rolled oats (not quick oats): They provide the hearty, chewy texture that makes these bars feel substantial. Quick oats turn to mush and don’t hold up as well. My grandmother Marta used rolled oats for everything — she said quick oats were for people in a hurry who didn’t care about texture. I tend to agree.
- 1 ¼ cups whole wheat flour (or oat flour for GF): Whole wheat gives it a nutty, wholesome flavor that pairs beautifully with the sweet strawberries. If you need these gluten-free, a good 1:1 GF flour blend works perfectly.
- ⅓ cup maple syrup (or honey): This is the only sweetener in the bars themselves. The strawberries bring their own natural sweetness, so you don’t need much. My family prefers honey with strawberries — there’s a floral note that feels right for spring and summer.
- ⅓ cup coconut oil, melted (or butter): Coconut oil keeps them dairy-free and adds a subtle richness. Butter gives a more traditional shortbread flavor. I’ve made them both ways and honestly? They’re both wonderful.
- 2 cups fresh or frozen strawberries, chopped: If you’re using frozen, don’t thaw them first — just toss them straight into the thickener. They’ll break down as they bake into a perfect jammy center.
- 1 tablespoon lemon juice + 1 teaspoon lemon zest: This is the secret ingredient that makes the strawberries taste more like themselves. The acid brightens the whole bar and keeps it from tasting flat.
- 1 tablespoon arrowroot or cornstarch: This thickens the strawberry juices so they set into a jam rather than soaking into the crust. I’ve skipped it before and regretted it.
The Simple Setup
- 8×8-inch baking dish — this gives you bars with good height, not flat slivers
- Parchment paper for the sling method (trust me on this — it makes lifting the bars out so much easier)
- Food processor or a pastry cutter if you want to do it by hand
- A sharp knife for clean cuts (a dull one will drag through the jam)
Let’s Make These Bars — Start to Finish
This goes fast, so read through once before you start. The oven does most of the work.
Preheat & Prep: Preheat your oven to 375°F. Line your 8×8 dish with parchment paper, leaving an overhang on two sides so you can lift the bars out later.
- Make the strawberry filling: In a small bowl, toss the chopped strawberries with the lemon juice, lemon zest, and arrowroot or cornstarch. Set aside while you make the crust. (📸 Photo tip: You should see a light, even coating of the white powder on the berries — this means they’ll thicken properly.)
- Mix the dry ingredients: In your food processor, combine the rolled oats, whole wheat flour, baking soda, and salt. Pulse a few times to break up the oats slightly — about 5-6 pulses. You want some texture left, not a fine powder.
- Add the wet ingredients: Add the melted coconut oil (or butter), maple syrup (or honey), and vanilla extract. Pulse again until the mixture looks like wet sand and holds together when you squeeze it in your hand. If it seems too dry, add a tablespoon of cold water. (📸 Photo tip: The mixture should clump easily when pressed between your fingers, but not be greasy.)
- Press the bottom crust: Transfer about two-thirds of the oat mixture to your prepared pan. Press it down firmly and evenly using your hands or the bottom of a measuring cup. This step is non-negotiable — a loosely packed crust will crumble when you cut.
- Pre-bake the crust: Bake for 10 minutes. This is the step that keeps everything from going soggy later. Worth every second.
- Add the strawberry layer: Spread the strawberry mixture evenly over the pre-baked crust. Make sure it’s in an even layer so every bar gets its fair share of jam.
- Add the crumb topping: Sprinkle the remaining oat mixture over the strawberries. Don’t press it down — let it sit loosely on top for a rustic, crumbly finish.
- Bake: Bake for 25-30 minutes, until the edges are bubbling and the top is a deep golden brown. The strawberry juices should be visibly thick and jammy around the edges. (📸 Photo tip: You’ll see the jam bubbling up around the sides of the crumb topping — that’s how you know it’s set.)
- Cool completely: This is the hardest part. Let the bars cool in the pan for at least 1 hour. If you try to cut them warm, the jam will ooze out and the bars won’t hold their shape. I know it’s tempting. I’ve made this mistake. Trust me on this one.
Make a Batch on Sunday, Enjoy All Week
I make a double batch on Sundays and we’re set for school lunches and quick breakfasts until Wednesday. They disappear fast in our house, but here’s how to keep them fresh if yours last longer.
- Fridge: Store in an airtight container for up to 5 days. Layer parchment between the bars so the crumb topping doesn’t stick.
- Freezer: Yes, these freeze beautifully. Wrap each bar individually in parchment paper, then place in a freezer bag. They’ll keep for up to 3 months.
- Reheat: Pop a frozen bar in a 300°F oven for 5-6 minutes to re-crisp the top. The microwave works in a pinch but it softens the crumb — I prefer the oven when I have the extra 5 minutes.
A Few Things I Learned the Hard Way
- Don’t skip the pre-bake. I know it seems like an extra step, but it’s the difference between a bar that holds together and a bar that turns into strawberry oatmeal soup at the bottom. I learned this after my first disastrous batch.
- Press the crust firmly. Really press it. Use the bottom of a measuring cup if you have to. A loosely packed crust will crumble the second you try to lift a bar out of the pan.
- Use the parchment sling. Trust me on this one. When you lift the entire block of bars out of the pan by the parchment overhang, you get clean edges that are so much easier to cut. No scraping, no stuck bars.
- Let them cool completely. I put this in the steps too, but it bears repeating. The bars need time to set. If you cut them warm, the jam will run and the crumb will fall apart. I let mine cool for a full hour, sometimes longer.
Swaps That Actually Work
- Gluten-Free: Use certified gluten-free oats and replace the whole wheat flour with a 1:1 GF baking blend. I’ve tested this and it works beautifully.
- Mixed Berry: Swap half the strawberries for blueberries or raspberries. The blueberries add a pop of color and the raspberries bring a little tartness that balances the sweetness.
- Nutty Crumb: Add ¼ cup of sliced almonds or chopped pecans to the crumb topping. Toast them lightly with the oats for extra flavor.
- Kid-Friendly: My kids love these with a handful of white chocolate chips sprinkled on top in the last 2 minutes of baking. It’s not exactly “healthy” anymore, but it makes them extra excited.
The Questions I Get About These Bars All the Time
Q: Why did my bars fall apart?
A: Ugh, I’ve been there. It usually comes down to one of three things: you didn’t press the bottom crust firmly enough, you cut them before they were fully cooled, or you skipped the thickener on the strawberries. All easy fixes for next time!
Q: Can I use quick oats instead of rolled oats?
A: You can, but the texture will be much softer — more like a baked oatmeal than a bar. Rolled oats give you that chewy, satisfying bite that holds everything together. I recommend sticking with rolled if you can.
Q: How long do these last? Can I freeze them?
A: They’ll keep in the fridge for up to a week in an airtight container. And yes, they freeze beautifully! Wrap each bar individually in parchment and pop them in a freezer bag. They’ll be good for up to 3 months.
Q: What do you serve with these?
A: For breakfast, I love them with a dollop of Greek yogurt and a drizzle of extra honey. For a lunchbox treat, they’re perfect on their own. And if I’m feeling fancy, I warm one up and serve it with a scoop of vanilla ice cream for dessert.
More Recipes My Family Makes on Repeat
If you liked these bars, here are a few others that get the same reaction at our table:
- Soft-Baked Blueberry Oatmeal Cups — Perfect for grab-and-go mornings
- No-Bake Peanut Butter Granola Bars — My kids ask for these every single week
- [INTERNAL LINK PLACEHOLDER: Maple Almond Flax Crackers] — A savory snack that’s just as easy to batch-make
These bars have saved our mornings more times than I can count. They’re the kind of recipe that quietly becomes part of your routine — the one you make without thinking, the one you send in lunchboxes, the one that disappears before you’ve had a chance to have one yourself. I hope they bring the same quiet ease to your kitchen.
If you try them, I’d love to hear how they go for you — drop a comment below or tag me on Pinterest so I can see yours!
📌 Healthy Strawberry Oatmeal Bars that stay perfectly soft and jammy — save this recipe for your next kid-friendly breakfast prep or school lunch planning.
Healthy Strawberry Oatmeal Bars That Actually Stay Together (No Crumbly Mess)
Equipment
- 8×8-inch baking dish
- Parchment Paper
- Food processor (or pastry cutter)
- Sharp Knife
Ingredients
For the Crust
- 1 ½ cups rolled oats
- 1 ¼ cups whole wheat flour (or oat flour for GF)
- ½ teaspoon baking soda
- ¼ teaspoon salt
- ⅓ cup maple syrup (or honey)
- ⅓ cup coconut oil, melted (or butter)
- 1 teaspoon vanilla extract
- 1 tablespoon cold water (if needed)
For the Strawberry Filling
- 2 cups strawberries, chopped (fresh or frozen)
- 1 tablespoon lemon juice
- 1 teaspoon lemon zest
- 1 tablespoon arrowroot or cornstarch
Instructions
- Preheat oven to 375°F. Line an 8×8-inch baking dish with parchment paper, leaving an overhang on two sides for easy lifting.
- In a small bowl, toss the chopped strawberries with lemon juice, lemon zest, and arrowroot or cornstarch. Set aside.
- In a food processor, combine the rolled oats, whole wheat flour, baking soda, and salt. Pulse 5-6 times to break up the oats slightly.
- Add the melted coconut oil, maple syrup, and vanilla extract. Pulse until the mixture looks like wet sand and holds together when squeezed. If it seems too dry, add a tablespoon of cold water.
- Transfer about two-thirds of the oat mixture to the prepared pan. Press it down firmly and evenly using your hands or the bottom of a measuring cup.
- Bake for 10 minutes (pre-bake the crust). Remove from oven.
- Spread the strawberry mixture evenly over the pre-baked crust.
- Sprinkle the remaining oat mixture over the strawberries. Do not press it down.
- Bake for 25-30 minutes, until the edges are bubbling and the top is deep golden brown.
- Cool completely in the pan for at least 1 hour before cutting. Lift out using the parchment sling and cut into 9 bars.
Notes
Related posts:
 High-Protein Overnight Oats That Actually Taste Like Breakfast (Not a Chalky Disaster)
 The Slow Cooker Cowboy Casserole That Saves Tired Weeknights (No Soggy Tots Allowed)
 Quick Lemon Ricotta Pasta for Busy Weeknights: Creamy, Bright, and on the Table in 20 Minutes
 Lemon Garlic Butter Baked Salmon in Foil That’s Ready in 25 Minutes — No Fuss, No Mess
 Lipton Onion Soup Meatloaf for Tuesday Nights: Moist, Savory, and the Only One You’ll Ever Need
 Moist Chocolate Zucchini Bread That Doesn’t Turn Out Rubbery — Finally