
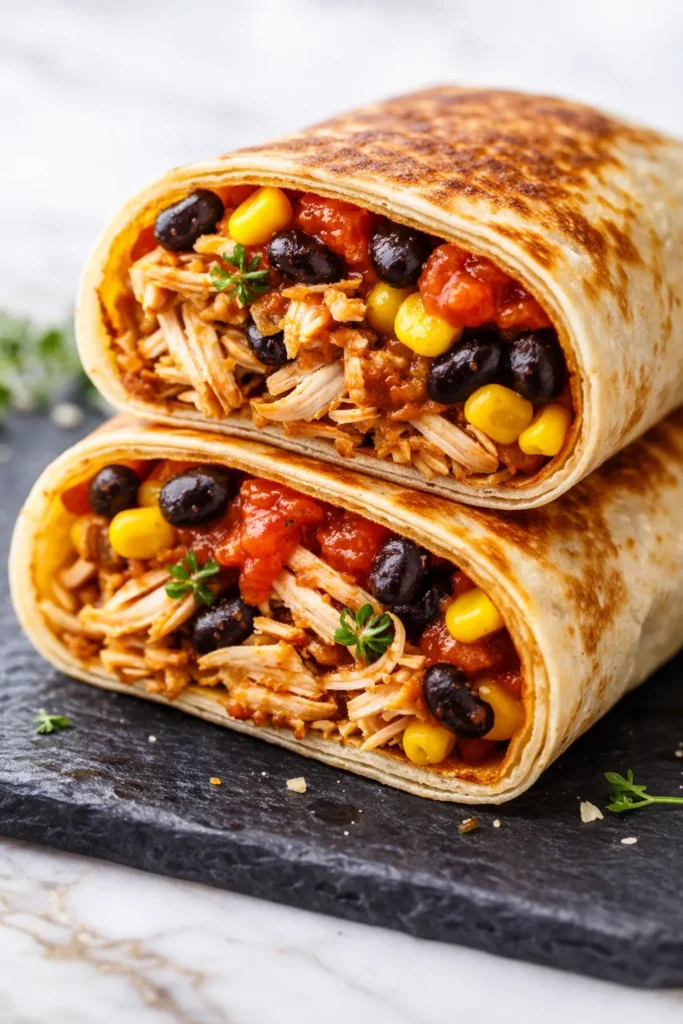
That first bite — when the tortilla shatters just a little and gives way to something warm and smoky and creamy all at once — is the exact reason these wraps have become our Friday night ritual. My kids don’t even ask what’s for dinner anymore. They just say “wrap night?” and I know exactly what they mean.
The short version: Smoky chicken, black beans, corn, and melty cheese in a crisp golden tortilla — done in half an hour flat.
I’ve made these at least forty times over the past two years, tweaking the spice blend and the assembly order until every single wrap held together beautifully and the outside stayed crunchy even after sitting in a lunchbox for a few hours. My pickiest eater, the one who sighs at anything with “too many colors,” asked for seconds the first time I made these. That’s when I knew the recipe was done.
- Serves: 4 as a main
- Hands-On Time: 15 min | Total Time: 30 min
- Difficulty: Easy enough for a Tuesday — no fancy skills needed
- Cost per serving: ~$3.50
- Calories: ~425 per wrap
- Dietary Notes: Naturally gluten-free if you use corn tortillas; easy to make dairy-free
(Photo above: overhead shot of two wraps sliced diagonally on a rustic wooden board, the filling spilling out just slightly — black beans, corn, shredded chicken, and melted cheese visible in cross-section, with a small bowl of crema for dipping in the corner, warm afternoon light from the side.)
The One Trick That Keeps These Wraps from Getting Soggy
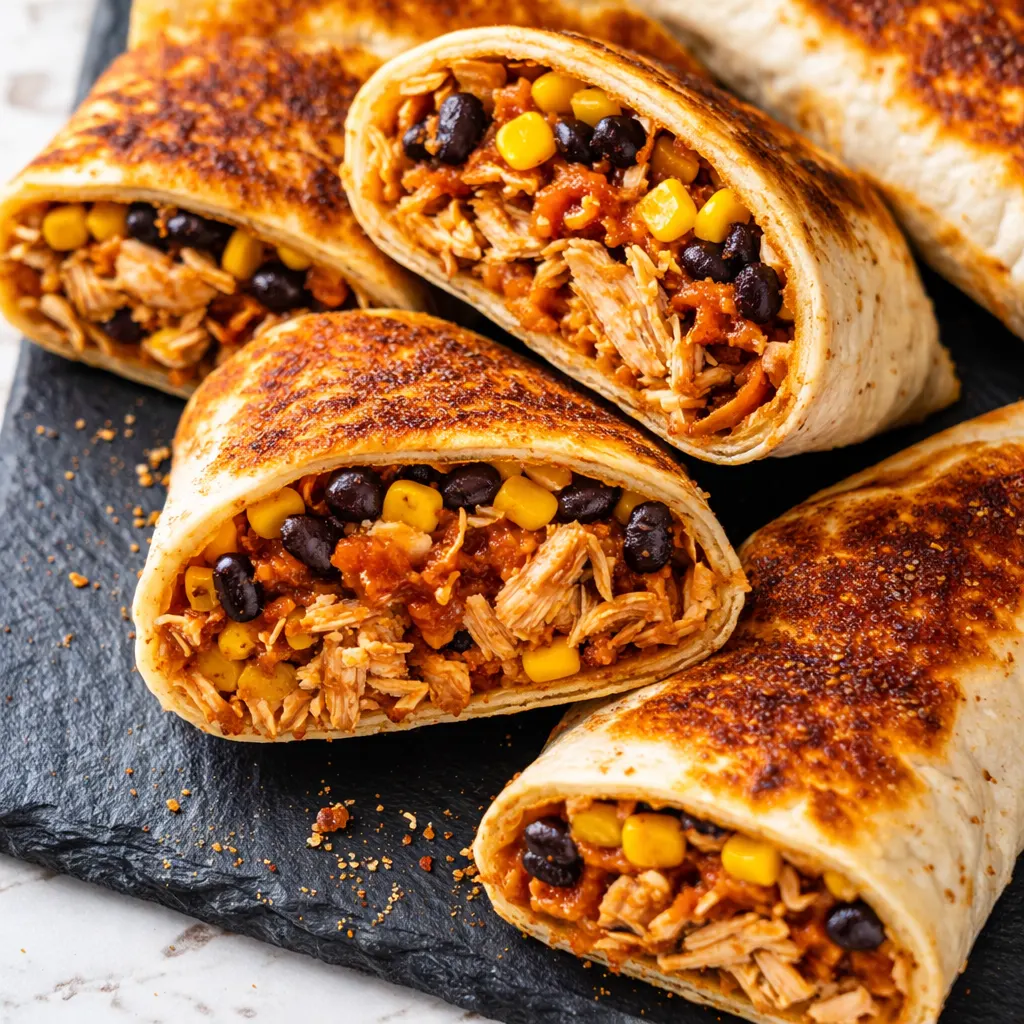
I tried every method I could think of before I landed on this one. Lettuce as a barrier layer. Patting the beans dry. Toasting the tortillas first. Some of those helped a little, but none of them solved the real problem — moisture from the filling seeps into the tortilla while it sits, and by lunchtime you’re holding a sad, limp thing that falls apart in your lap.
The fix turned out to be simpler than I expected: a thin spread of cream cheese or sour cream on the tortilla before anything else goes on. That fat layer acts like a waterproof seal between the tortilla and the filling. It’s the same principle as buttering bread before adding jam — the fat keeps the moisture from soaking through. I learned this the hard way after way too many soggy wraps, and I promise you it changes everything.
The other non-negotiable? Giving the tortillas a quick dry toast in a hot skillet before assembly. Thirty seconds per side, no oil. It dries out the surface just enough that it crisps up beautifully when you pan-fry the finished wrap. Skip this step and you’ll still have a good wrap. Do it and you’ll have one your family will request by name.
Everything You Need (And a Few Notes From Me)
- 2 cups cooked shredded chicken: Rotisserie chicken is my shortcut and I’m not sorry about it. My kids actually prefer it to leftover homemade — something about the seasoning on the skin that mixes in when you shred it.
- 1 cup canned black beans, rinsed and drained: Rinsing is important here — that starchy liquid in the can will make your filling pasty if you skip it. I’ve used pinto beans in a pinch and they work fine, but black beans feel more right for the Southwest vibe.
- ¾ cup frozen or canned corn, drained: Frozen corn that’s been thawed and patted dry gives the best texture. Canned works too — just drain it really well. My youngest likes to pick the corn out and eat it first. I pretend not to notice.
- 4 large flour tortillas (10-inch): Burrito-sized, not taco-sized. You need the real estate to fit everything and still have room to fold. I use flour for the soft chew, but corn tortillas work if you’re gluten-free — warm them first so they don’t crack.
- 4 oz cream cheese, softened: This is the barrier layer I mentioned. Full-fat works best for the seal, but Neufchâtel (low-fat) is fine. Let it sit on the counter while you prep everything so it spreads easily.
- 1 cup shredded Monterey Jack or pepper jack cheese: Pepper jack adds a nice little kick if your family can handle it. Monterey Jack is milder and still melts beautifully. I buy the block and shred it myself — the pre-shredded stuff doesn’t melt as smooth.
- ½ cup fresh salsa or pico de gallo, drained: The draining is key — extra liquid is the enemy of a crispy wrap. I use a fine-mesh strainer and press gently with the back of a spoon.
- ½ teaspoon each: cumin, smoked paprika, garlic powder: The holy trinity for that Southwest flavor. I tried adding chili powder once and it overwhelmed everything — these three are all you need.
- Pinch of salt and black pepper
- 1 tablespoon butter or oil for cooking: Butter gives a richer golden crust. Oil works if you’re dairy-free. I use butter because… well, butter.
What to Pull Out Before You Start
- A large skillet or griddle — cast iron if you have it, nonstick works fine
- A mixing bowl for the filling
- A spatula — preferably a wide one for flipping the wraps
- A cutting board and a sharp knife for slicing
That’s it. No food processor, no special equipment, nothing fancy.
Let’s Make It (Step by Step)
This goes fast once you start, so I like to have everything measured and ready before I turn on the stove. Read through once and you’ll fly through it.
First, prep the filling:
- Mix: In a medium bowl, combine the shredded chicken, rinsed black beans, drained corn, drained salsa, cumin, smoked paprika, garlic powder, salt, and pepper. Stir until everything is evenly coated in the spices. Taste it and add more salt if it needs it — the right seasoning here makes all the difference. (📸 Photo tip: The filling should look colorful and evenly mixed — every piece of chicken should have a little bit of spice clinging to it.)
- Toast the tortillas: Heat your skillet over medium heat. Lay a tortilla in the dry pan for 30 seconds per side — just until you see a few pale brown spots. Stack them on a plate as you go. This step is worth every second. (📸 Photo tip: The tortilla should look dry and slightly blistered in spots — not fully browned, just warmed through with a few toasty marks.)
- Spread the barrier layer: Lay a toasted tortilla flat on your work surface. Spread about 1 tablespoon of the softened cream cheese in a thin, even layer across the whole surface, leaving a 1-inch border around the edge. Don’t skip the border — you need that bare edge to seal the wrap later.
- Layer the filling: Spoon about ¾ cup of the chicken mixture into the center of the tortilla in a rough rectangle shape. Top with ¼ cup of shredded cheese. Don’t overfill — the most common mistake is trying to cram too much in, and then the wrap won’t close properly. I learned this one the hard way. Trust me — less is more here.
- Fold and roll: Fold the sides of the tortilla inward over the filling, then fold the bottom flap up over the filling, tucking it snugly. Roll tightly away from you until the seam is on the bottom. The cream cheese border will help it stick closed. If it doesn’t stay shut, you can put a toothpick through the seam while it cooks — just remember to remove it before serving.
- Sear the wraps: Wipe out the skillet and add ½ tablespoon of butter over medium heat. Place the wraps seam-side down in the pan — don’t crowd them, cook 2 at a time if needed. Cook for 2–3 minutes per side, until deep golden brown and crispy. The cheese inside should be fully melted by the time the outside is done. (📸 Photo tip: The finished tortilla should be an even golden-brown color all over, with a few darker spots where the butter browned — that’s where the crunch lives.)
- Rest and slice: Transfer the cooked wraps to a cutting board and let them rest for 2 minutes. This lets the cheese set slightly so the filling doesn’t spill out when you cut. Slice diagonally with a sharp knife — a gentle sawing motion works better than pressing straight down.
How I Meal Prep These for the Week
I make a double batch on Sundays, and we’re set for lunch through Wednesday. The trick is to cook them completely, let them cool on a wire rack (not a plate — you want air circulating so they stay crispy), then wrap each one individually in foil. My secret: I reheat them in a dry skillet, not the microwave. The microwave makes the tortilla chewy and sad. A quick 3 minutes per side in a hot pan brings the crunch back like magic.
- Fridge: Store in foil or an airtight container for up to 4 days. Reheat in a skillet over medium heat, 3 minutes per side.
- Freezer: Yes! Wrap individually in foil, then place in a freezer bag. Freeze for up to 3 months. Thaw overnight in the fridge before reheating in a skillet.
- Reheat: Skillet is best — 3–4 minutes per side over medium heat. The microwave works in a pinch (90 seconds) but the tortilla will be soft, not crispy.
Things I Wish I’d Known the First Time
- Don’t skip the cream cheese barrier: I know it sounds like an extra step you could ignore, but I’ve tested it both ways side by side. The version without it gets noticeably soggy within 20 minutes. The version with it stays crisp for hours. My husband thought I was overthinking it until he tried both — now he’s the one reminding me to soften the cream cheese.
- Dry your ingredients: Wet fillings are the enemy of a crispy wrap. Pat the beans dry with a paper towel. Drain the corn. Drain the salsa. It takes 30 seconds and it changes the texture completely.
- Let the cooked wrap rest before cutting: I know you want to cut into it immediately — I do too. But if you slice while the cheese is still molten, everything slides out and you lose that perfect cross-section. Two minutes is all it needs. Set a timer if you have to.
- Even if the first one comes out messy, keep going: My first wrap of every batch is always a little sad. The second one is perfect. I don’t know why, but it’s a pattern I’ve accepted. Don’t judge the recipe by the first attempt.
Swaps That Actually Work
- Dairy-free: Use a dairy-free cream cheese alternative (I like Kite Hill) and omit the cheese or use a plant-based shred. The barrier layer still works with dairy-free cream cheese. This is the version I make for my nephew who can’t do dairy — he loves it and always asks for extras.
- Gluten-free: Use large corn tortillas or gluten-free flour tortillas. Warm them in the microwave (20 seconds, wrapped in a damp paper towel) before toasting so they don’t crack when you fold. Corn tortillas give a slightly different texture — more rustic, less chewy — but still delicious.
- Spicy version: Add 1 diced jalapeño (seeds removed unless you want real heat) to the filling, or use pepper jack cheese instead of Monterey Jack. My kids need the mild version but I do a jalapeño version for the adults after bedtime — it’s my little treat.
- Vegetarian version: Omit the chicken and add 1 cup of roasted sweet potato cubes (diced small) or an extra can of black beans. The sweet potato version is honestly my favorite — the sweetness plays beautifully with the smoky spices.
- Make-ahead for a crowd: Assemble all the wraps (uncooked) the night before, wrap tightly in plastic, and cook them fresh the next day. They’ll keep in the fridge for up to 24 hours before cooking. Perfect for brunch gatherings or game day.
Questions I Get About This Recipe All the Time
Q: Why did my tortilla crack when I rolled it?
A: Ugh, I’ve been there. Two things: the tortilla was either too cold or too dry. Always warm your tortillas before assembly — a quick 20 seconds in the microwave or the dry-toast step I mention above. If they’re still cracking, try a different brand. Some tortillas are just stiffer than others. You’ve got this next time.
Q: Can I make these with ground beef instead of chicken?
A: Yes, absolutely. Brown 1 pound of ground beef (or turkey) with the same spice blend — cumin, smoked paprika, garlic powder — and use that instead of the shredded chicken. Just make sure to drain any excess fat before mixing it into the filling. I’ve tested this and it works great — my husband actually requests the beef version sometimes.
Q: How long do these last in the fridge? Can I freeze them?
A: They keep in the fridge for up to 4 days in foil or an airtight container. For freezing, wrap each cooked wrap individually in foil, place in a freezer bag, and freeze for up to 3 months. Thaw overnight in the fridge, then reheat in a dry skillet over medium heat for 3–4 minutes per side. The skillet is key — it brings back the crunch. The microwave works in a pinch but the tortilla will be soft.
Q: What do you serve with these wraps?
A: They’re honestly a full meal on their own, but if you want something on the side: a simple lime-cilantro slaw (shredded cabbage, lime juice, cilantro, a drizzle of olive oil), black bean soup, or a side of Mexican rice. My kids love these with tortilla chips and salsa — we call it “wrap night extravaganza.” On weekends, I sometimes add a side of grilled corn with cotija cheese.
More Recipes My Family Makes on Repeat
If you liked this one, here are a few others that get the same reaction at our table:
- [INTERNAL LINK PLACEHOLDER: Sheet Pan Chicken Fajitas] — The one-pan version that’s on the table in 25 minutes and tastes like it took twice that long
- [INTERNAL LINK PLACEHOLDER: Creamy Black Bean Soup] — The soup that uses the same pantry staples and freezes like a dream
- [INTERNAL LINK PLACEHOLDER: Easy Guacamole That Stays Green] — The trick is a squeeze of lime and pressing plastic wrap right onto the surface
These wraps have saved more Tuesday nights than I can count. They’re the kind of recipe you don’t have to think about — the ingredients are forgiving, the method is straightforward, and even on the nights when everything else goes sideways, these come out right. That’s the kind of dinner I think we all need more of.
If you try them, drop a comment below — I love hearing how it goes for your family. And tag me on Pinterest so I can see yours!
📌 Save this Southwest chicken wrap recipe for your next busy weeknight — it’s the 30-minute dinner the whole family will actually eat.
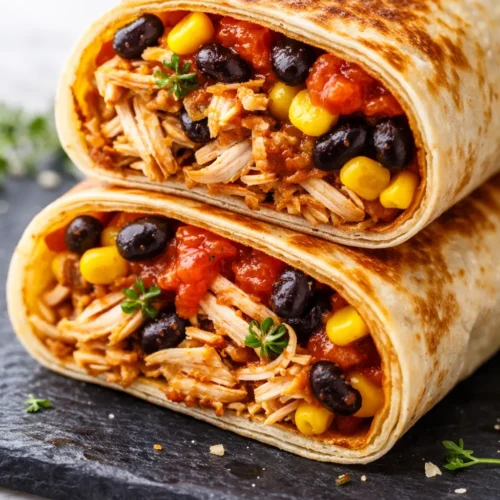
Southwest Chicken Wraps That Stay Crispy Even the Next Day
Equipment
- Large skillet or griddle
- Mixing Bowl
- Spatula
- Cutting Board
- Sharp Knife
Ingredients
- 2 cups cooked shredded chicken
- 1 cup canned black beans, rinsed and drained
- 3/4 cup frozen or canned corn, drained
- 4 large flour tortillas (10-inch)
- 4 oz cream cheese, softened
- 1 cup shredded Monterey Jack or pepper jack cheese
- 1/2 cup fresh salsa or pico de gallo, drained
- 1/2 teaspoon cumin
- 1/2 teaspoon smoked paprika
- 1/2 teaspoon garlic powder
- 1 pinch salt
- 1 pinch black pepper
- 1 tablespoon butter or oil for cooking
Instructions
- Mix: In a medium bowl, combine the shredded chicken, rinsed black beans, drained corn, drained salsa, cumin, smoked paprika, garlic powder, salt, and pepper. Stir until everything is evenly coated in the spices. Taste it and add more salt if it needs it — the right seasoning here makes all the difference.
- Toast the tortillas: Heat your skillet over medium heat. Lay a tortilla in the dry pan for 30 seconds per side — just until you see a few pale brown spots. Stack them on a plate as you go. This step is worth every second.
- Spread the barrier layer: Lay a toasted tortilla flat on your work surface. Spread about 1 tablespoon of the softened cream cheese in a thin, even layer across the whole surface, leaving a 1-inch border around the edge. Don’t skip the border — you need that bare edge to seal the wrap later.
- Layer the filling: Spoon about 3/4 cup of the chicken mixture into the center of the tortilla in a rough rectangle shape. Top with 1/4 cup of shredded cheese. Don’t overfill — the most common mistake is trying to cram too much in, and then the wrap won’t close properly.
- Fold and roll: Fold the sides of the tortilla inward over the filling, then fold the bottom flap up over the filling, tucking it snugly. Roll tightly away from you until the seam is on the bottom. The cream cheese border will help it stick closed. If it doesn’t stay shut, you can put a toothpick through the seam while it cooks — just remember to remove it before serving.
- Sear the wraps: Wipe out the skillet and add 1/2 tablespoon of butter over medium heat. Place the wraps seam-side down in the pan — don’t crowd them, cook 2 at a time if needed. Cook for 2–3 minutes per side, until deep golden brown and crispy. The cheese inside should be fully melted by the time the outside is done.
- Rest and slice: Transfer the cooked wraps to a cutting board and let them rest for 2 minutes. This lets the cheese set slightly so the filling doesn’t spill out when you cut. Slice diagonally with a sharp knife — a gentle sawing motion works better than pressing straight down.
Notes
Related posts:
 Mini Quiche Recipe: The Store-Bought Crust Version That Tastes Like You Made It From Scratch
 The Slow Cooker Cowboy Casserole That Saves Tired Weeknights (No Soggy Tots Allowed)
 Creamy Beef and Shells for Tuesday Nights: The One-Pot Dinner My Kids Actually Ask For
 Quick Lemon Ricotta Pasta for Busy Weeknights: Creamy, Bright, and on the Table in 20 Minutes
 Juicy Oven Baked Chicken Thighs That Stay Golden and Tender — in 40 Minutes
 Lemon Garlic Butter Baked Salmon in Foil That’s Ready in 25 Minutes — No Fuss, No Mess