
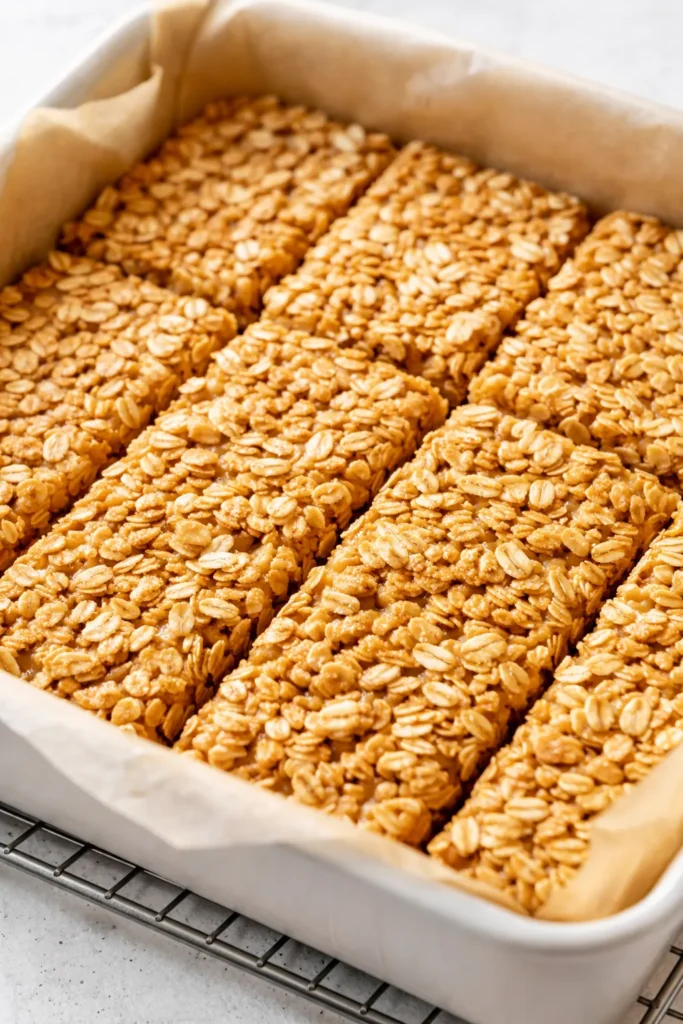
I’ve been working on homemade no bake granola bars that actually hold together for long enough that my family stopped rolling their eyes when I put a new batch on the counter. Every version I tried for two years was a compromise — too crumbly, too hard, or so sweet they might as well have been candy. This batch? My kids asked for seconds before I’d even cut them into bars. The trick is the sticky binder ratio, and after testing it about forty times, I can promise you’ve got everything you need in your pantry right now.
The short version: Chewy, perfectly sweet, and they hold their shape without a single minute in the oven.
I’ve made these every other Sunday for the past six months, and they’re the first lunchbox item that comes back empty. Not a single crumb left in the Tupperware.
- Serves: 12 bars as a snack or lunchbox staple
- Hands-On Time: 15 min | Total Time: 1 hr 15 min (incl. chilling)
- Difficulty: Easy enough for a school morning prep — my nine-year-old can do it herself
- Cost per serving: ~$0.60 per bar
- Calories: ~220 per bar (varies with mix-ins)
- Dietary Notes: Naturally dairy-free and easily gluten-free with certified oats
(Photo above: a neatly stacked pyramid of granola bars on a white ceramic plate, drizzled with melted dark chocolate, morning light from the east window catching the oat and almond texture, a few flaked sea salt crystals visible on top.)
The Sticky Secret That Keeps These From Crumbling
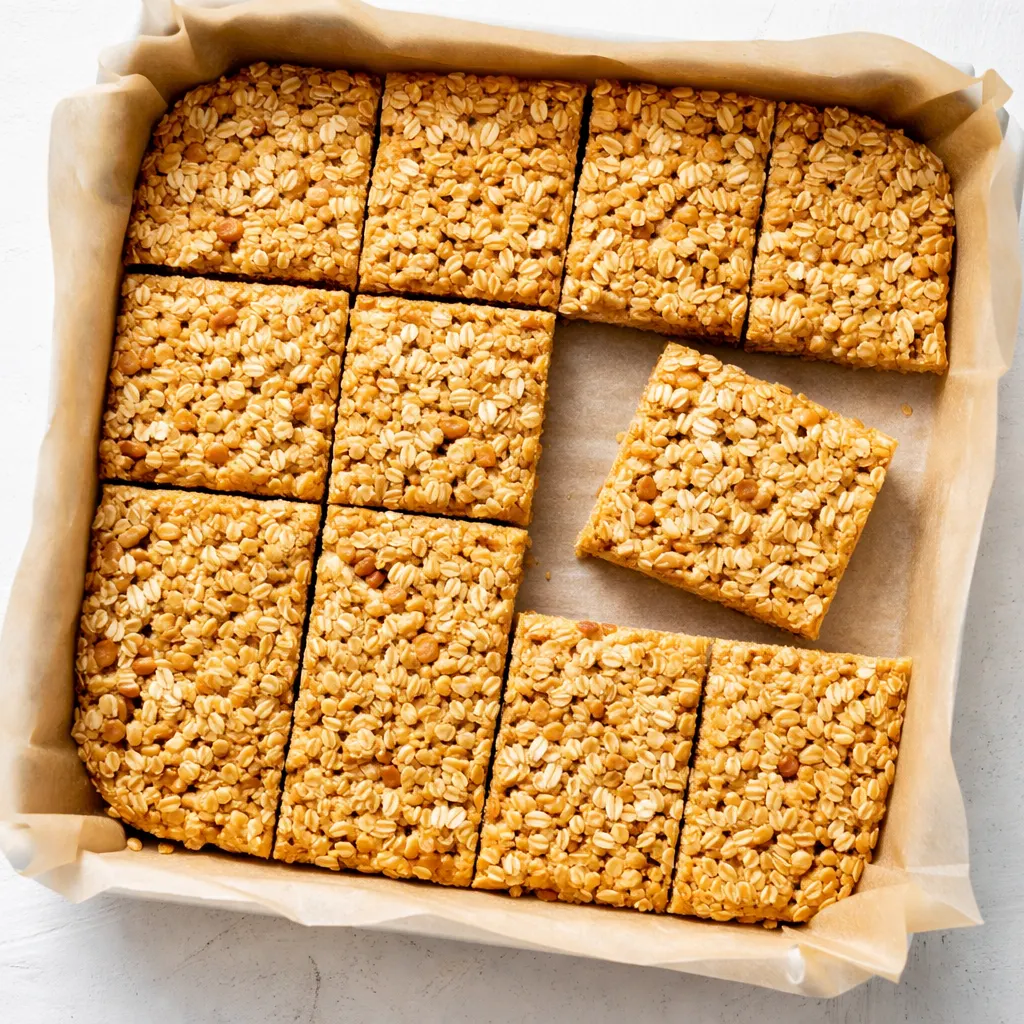
The honey and nut butter work together as the glue. Too much and they’re hard as a rock. Too little and you’ve got a bowl of tasty crumbs. I found the exact ratio after way too many sad batches — and it turns out the answer is a tablespoon of coconut oil. It keeps the bars firm when chilled but soft enough to bite into without breaking a tooth.
The other non-negotiable? Pressing the mixture into the pan hard enough that you think you might break the dish. That compression is what keeps every oat locked into place. I use the bottom of a measuring cup and I lean into it.
The result is a bar that bends slightly before it breaks, studded with whatever you love most, and sweet enough to feel like a treat without sending anyone into a sugar spiral before lunch.
What Goes In — Plus My Honest Notes
- 2 cups rolled oats (not quick oats): Quick oats turn to mush. Rolled oats give the bars their structure and that satisfying chew.
- 1 cup creamy peanut butter (or almond butter): Use the natural, drippy kind. The stabilizers in conventional peanut butter make the bars too dense. My kids can smell the difference when I use almond butter — they don’t love it, but it works for school when nut-free isn’t required.
- ½ cup honey (or maple syrup): Honey gives the best sticky texture. Maple syrup works but makes the bars slightly softer. I use local honey when I can find it.
- ¼ cup coconut oil: This is the secret ingredient. It keeps the bars firm when chilled but chewy at room temperature. Don’t skip it — I tried coconut oil alternatives and nothing works the same.
- 1 tsp vanilla extract: Just a little warmth to round out the flavor.
- ½ tsp salt: Essential. It balances the sweetness and makes everything taste more like itself.
- 1 cup total mix-ins: Dark chocolate chips, dried cherries, chopped almonds, sunflower seeds, flaked coconut. Whatever you love. My kids demand mini chocolate chips and nothing else.
What to Pull Out Before You Start
- 8×8 baking dish — glass or metal works fine
- Parchment paper — the real MVP here. Leave a long overhang on two sides so you can lift the whole slab out cleanly.
- Medium saucepan — for warming the binder
- Wooden spoon or silicone spatula
- Measuring cup — for pressing the mixture flat (the flat bottom is key)
Let’s Make Them — Step by Step
This goes fast, so measure everything out before you turn on the stove. Trust me, it makes the whole thing smoother.
- Toast the oats: Spread the rolled oats on a rimmed baking sheet. Toast at 350°F for 10 minutes, stirring once halfway through. You’re looking for a light golden color and a warm, nutty smell that fills the kitchen. (📸 Photo tip: They should be just barely golden — not dark brown. If they look pale, give them two more minutes.)
- Line the pan: Cut a sheet of parchment paper long enough to overhang two opposite sides of your 8×8 dish. Press it into the corners. This is what lets you lift the finished slab out without any mangling.
- Warm the binders: In a medium saucepan, combine the peanut butter, honey, coconut oil, vanilla, and salt. Warm over low heat, stirring constantly, until everything is smooth and runny. Don’t let it boil. You just want it warm enough to stir easily — about 90 seconds total. (📸 Photo tip: It should look glossy and pour off the spoon like thick cream. If it looks separated or grainy, you got it too hot — take it off the heat and stir in a tablespoon of warm water.)
- Combine everything: Pour the warm binder over the toasted oats and mix-ins. Stir until every single oat is coated. The mixture should look glossy and smell deeply nutty and sweet — like the best part of breakfast.
- Press firmly: Transfer the mixture to your parchment-lined dish. Press it down HARD with the bottom of a measuring cup. I mean really lean into it. Get the corners especially — an unpacked corner will crumble first. (📸 Photo tip: You should see a uniform, packed-down surface with no visible air pockets. If you see loose oats, press more.)
- Chill: Refrigerate for at least 1 hour (or up to 24 hours if you’re planning ahead). When you lift the parchment, the slab should feel firm and solid — no bending at the center.
- Cut and enjoy: Use a sharp chef’s knife to cut cleanly through the slab. Cut straight down — no sawing motion. I get 12 bars out of one batch.
Sunday Prep = Stress-Free All Week
I make a double batch on Sundays and we’re set until Thursday. My secret: I wrap them individually in parchment so the kids can grab one from the fridge on school mornings without any fuss. They stay perfectly chewy and the chocolate chips stay intact.
- Fridge: Airtight container for up to 2 weeks. Layer parchment between the bars so they don’t stick together.
- Freezer: Wrap individually in parchment, then store in a freezer bag for up to 3 months. Thaw at room temperature for 5 minutes — or eat them frozen if you like a really firm texture. My kids think frozen ones are a treat.
- Reheat: No need! Eat straight from the fridge for a firm texture, or let them sit on the counter for 2 minutes for a chewier bite. The microwave makes them too soft — I don’t recommend it.
Things I Wish I’d Known the First Time
- Don’t skip the parchment paper overhang: My first batch was a crumbly mess because I tried to flip the whole pan upside down to get the slab out. Never again. The parchment trick makes it effortless.
- Pressing technique is everything: I know it sounds dramatic, but the difference between a packed bar and a loosely pressed bar is the difference between a lunchbox win and a bag of crumbs. Use the measuring cup. Lean into it. Really get the edges.
- Let them come to room temp for 2 minutes before eating: Straight out of the fridge they’re firm. After 2 minutes on the counter, they turn perfectly chewy. Trust me on this one — it’s a texture upgrade that takes almost no time.
- My first batch was a crumbly mess. My second was a brick. This batch? My kids asked for seconds before I’d even cut them. Give yourself permission to adjust. If they’re too crumbly, add a tablespoon more honey next time. If they’re too hard, add a teaspoon more coconut oil. You’ll find your sweet spot.
Make It Yours — Easy Variations
- Nut-Free: Use sunflower seed butter and add an extra pinch of salt to balance the bitterness. This is the version I make for my nephew who can’t do nuts — he loves it crumbled over yogurt.
- Gluten-Free: Use certified gluten-free oats. The rest of the ingredients are naturally gluten-free. I’ve tested this and it works perfectly.
- Fancy Guest Version: After cutting the bars, drizzle with melted dark chocolate and sprinkle with flaky sea salt. Let the chocolate set before serving. This is the version I bring to holiday brunches and it disappears in minutes.
- Kid-Friendly: Use creamy peanut butter and mini chocolate chips. Let them help press the mixture in — it’s a great sensory activity and they’re way more likely to eat something they helped make. My kids press the chocolate chips into the top of the bars before chilling so they stay visible.
- Tropical Version: Replace the chocolate chips with dried mango, macadamia nuts, and flaked coconut. This is what I make when I’m dreaming of summer in January.
Questions I Get About These Bars All the Time
Q: Why did my bars turn out crumbly?
A: Ugh, I’ve been there. Two most likely reasons: you didn’t press the mixture hard enough into the pan, or your binder ratio was slightly off. Next time, make sure your nut butter is really well stirred (natural ones separate) and press like you mean it. Even if they crumble a little, they’re amazing sprinkled over yogurt or ice cream.
Q: Can I use quick oats instead of rolled oats?
A: I don’t recommend it. Quick oats break down too much and turn the bars into a mushy, dense texture that doesn’t hold up well. Rolled oats give the bars their structure and that satisfying chew. If you only have quick oats, save them for a batch of oatmeal cookies instead.
Q: How long do these last? Can I freeze them?
A: They keep in the fridge for about 2 weeks in an airtight container — not that they’ll last that long. You can absolutely freeze them. Wrap each bar individually in parchment and store in a freezer bag for up to 3 months. They thaw in about 5 minutes at room temperature. I always keep a stash in the freezer for last-minute lunchbox emergencies.
Q: What do you serve with these?
A: They’re a snack on their own, but they’re also amazing crumbled over Greek yogurt with a drizzle of honey for breakfast. My kids love them as an after-school snack with a glass of milk. In the summer, I crumble them over vanilla ice cream with fresh berries — it’s like a deconstructed crisp and it’s absolutely delicious.
More Recipes My Family Makes on Repeat
If you liked these bars, you might also love a few other recipes that get the same reaction at our table:
- Chewy Oatmeal Raisin Cookies — the kind that stay soft for days, with a hint of cinnamon and a texture that reminds me of Marta’s kitchen.
- No-Bake Peanut Butter Energy Bites — even faster than these bars, made in one bowl, and perfect for a quick snack before soccer practice.
- Our Favorite Lunchbox Muffins — whole wheat, naturally sweetened with applesauce, and packed with enough staying power to get through a morning of classes.
This is the kind of recipe that gets passed around at school pickup and saved in group chats. It’s forgiving, flexible, and so much better than anything in a box. If you try it, drop a comment below — I love hearing how it goes for you and what mix-ins your family loved best.
📌 Save this homemade no bake granola bars recipe for your next Sunday meal prep — they’ll save you all week long and your kids will actually ask for them.
Homemade No Bake Granola Bars
Equipment
- 8×8 baking dish
- Parchment Paper
- Medium Saucepan
- Wooden spoon or silicone spatula
- Measuring cup for pressing
Ingredients
- 2 cups rolled oats (not quick oats)
- 1 cup creamy peanut butter (or almond butter), well stirred
- 1/2 cup honey (or maple syrup)
- 1/4 cup coconut oil
- 1 teaspoon vanilla extract
- 1/2 teaspoon salt
Mix-Ins
- 1 cup total mix-ins: dark chocolate chips, dried cherries, chopped almonds, sunflower seeds, flaked coconut, or any combination
Instructions
- Toast the oats: Spread the rolled oats on a rimmed baking sheet. Toast at 350°F for 10 minutes, stirring once halfway through. You’re looking for a light golden color and a warm, nutty smell that fills the kitchen. (Photo tip: They should be just barely golden — not dark brown. If they look pale, give them two more minutes.)
- Line the pan: Cut a sheet of parchment paper long enough to overhang two opposite sides of your 8×8 dish. Press it into the corners. This is what lets you lift the finished slab out without any mangling.
- Warm the binders: In a medium saucepan, combine the peanut butter, honey, coconut oil, vanilla, and salt. Warm over low heat, stirring constantly, until everything is smooth and runny. Don’t let it boil. You just want it warm enough to stir easily — about 90 seconds total. (Photo tip: It should look glossy and pour off the spoon like thick cream. If it looks separated or grainy, you got it too hot — take it off the heat and stir in a tablespoon of warm water.)
- Combine everything: Pour the warm binder over the toasted oats and mix-ins. Stir until every single oat is coated. The mixture should look glossy and smell deeply nutty and sweet — like the best part of breakfast.
- Press firmly: Transfer the mixture to your parchment-lined dish. Press it down HARD with the bottom of a measuring cup. I mean really lean into it. Get the corners especially — an unpacked corner will crumble first. (Photo tip: You should see a uniform, packed-down surface with no visible air pockets. If you see loose oats, press more.)
- Chill: Refrigerate for at least 1 hour (or up to 24 hours if you’re planning ahead). When you lift the parchment, the slab should feel firm and solid — no bending at the center.
- Cut and enjoy: Use a sharp chef’s knife to cut cleanly through the slab. Cut straight down — no sawing motion. I get 12 bars out of one batch.
Notes
Related posts:
 High-Protein Overnight Oats That Actually Taste Like Breakfast (Not a Chalky Disaster)
 Mini Quiche Recipe: The Store-Bought Crust Version That Tastes Like You Made It From Scratch
 The Slow Cooker Cowboy Casserole That Saves Tired Weeknights (No Soggy Tots Allowed)
 Quick Lemon Ricotta Pasta for Busy Weeknights: Creamy, Bright, and on the Table in 20 Minutes
 Lemon Garlic Butter Baked Salmon in Foil That’s Ready in 25 Minutes — No Fuss, No Mess
 Lipton Onion Soup Meatloaf for Tuesday Nights: Moist, Savory, and the Only One You’ll Ever Need