
There is nothing sadder than a brownie ice cream sandwich that shatters into a dozen crumbs the second you bite into it — except maybe one where the brownie has gone completely soft against the ice cream. I spent two summers trying to fix this problem. Every batch I pulled out of the freezer felt like a compromise until I landed on the one trick that changed everything.
The trick, I learned after way too many failed batches, is to let the brownies sit out overnight before you assemble. Sounds counterintuitive, right? Stale brownies make the best ice cream sandwiches. They hold their structure, they stay chewy, and they don’t absorb moisture from the ice cream the way a fresh-from-the-oven brownie does. My kids now request these for every birthday party and summer weekend. They assemble them themselves, and I don’t have to worry about a crumbly mess.
The short version: Twenty minutes of hands-on work, one overnight rest, and you get twelve perfect brownie ice cream sandwiches that stay chewy even after a week in the freezer.
I’ve made these for backyard barbecues, sleepover treats, and lazy Sunday afternoons when the heat makes turning on the oven feel like a commitment. Every single time, they disappear before anything else on the table.
- Serves: 12 sandwiches
- Hands-On Time: 20 min | Total Time: 4 hours (plus overnight brownie rest)
- Difficulty: Easy — just requires a little patience for the overnight step
- Cost per serving: ~$1.50
- Calories: ~380 per sandwich
- Dietary Notes: Vegetarian. Easily adaptable for gluten-free or dairy-free.
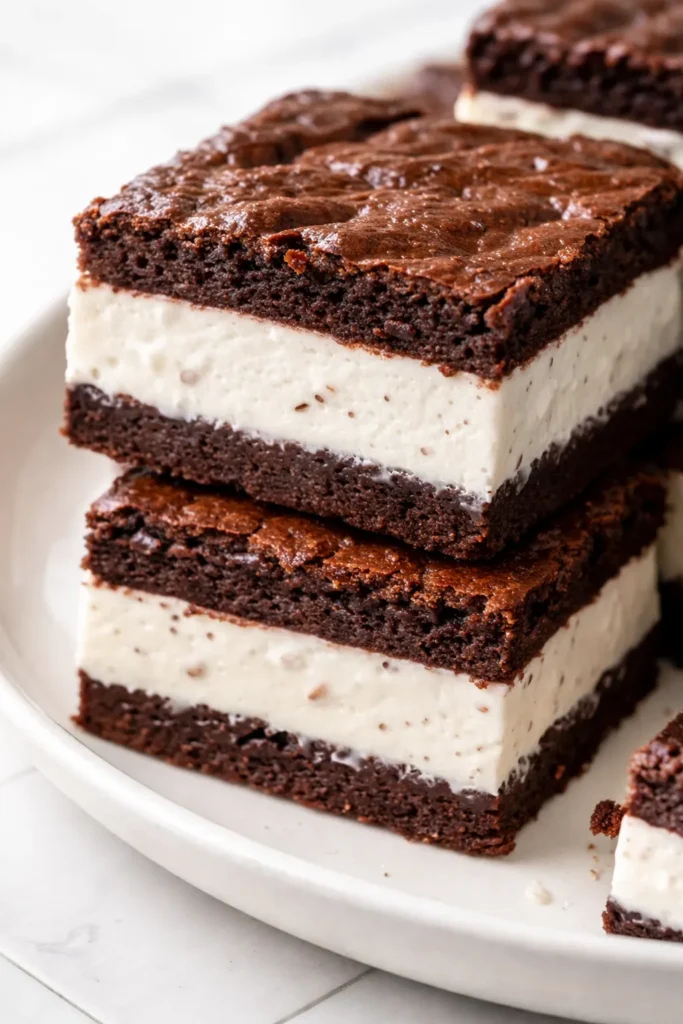
(Photo above: A cross-section shot of the assembled sandwich on a marble slab — the brownie is dense and fudgy, the vanilla ice cream is barely melting, and the whole thing is dusted with a light snowfall of powdered sugar. Sunlight from the kitchen window catches the edge of the brownie.)
The One-Day Wait That Changes Everything
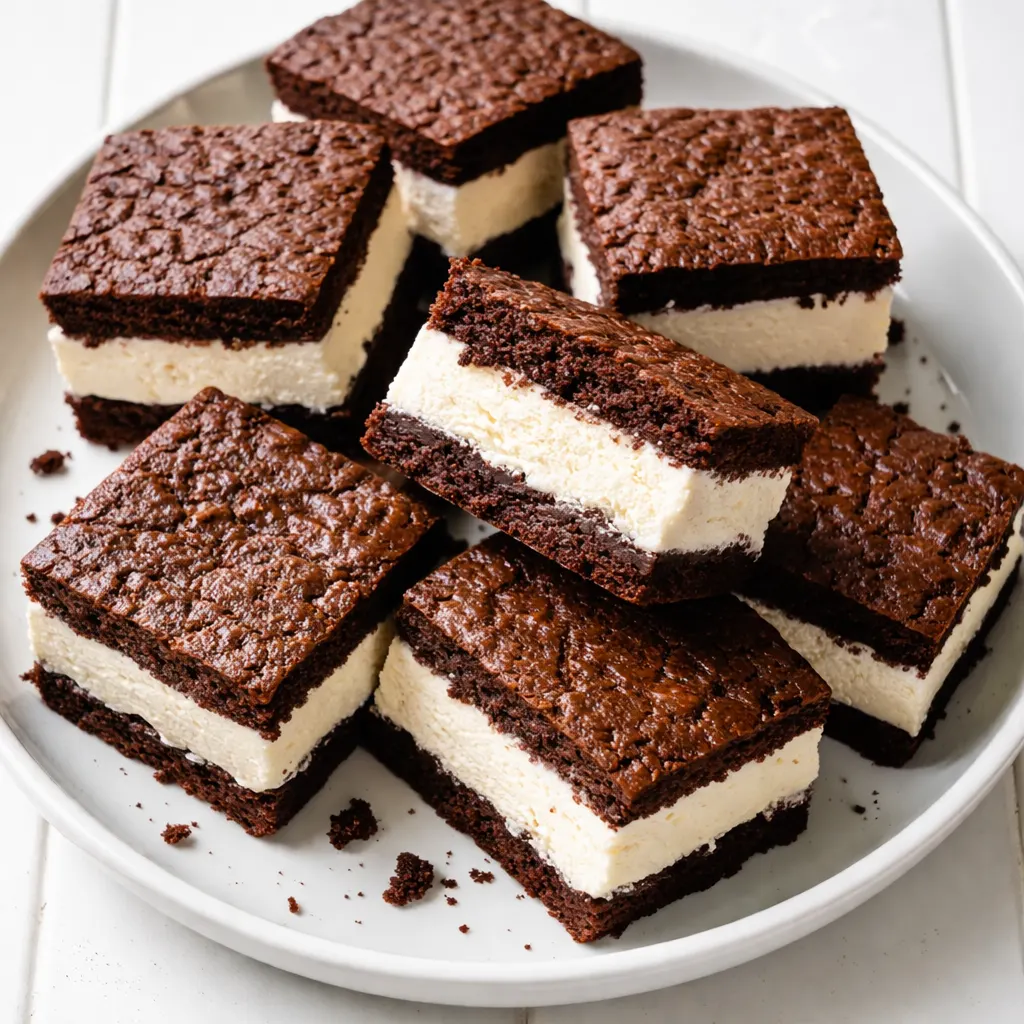
I was skeptical the first time someone told me day-old brownies were better for ice cream sandwiches. Then I tried it side by side with a fresh batch and understood immediately.
A fresh brownie has a soft, delicate crumb. It’s perfect with a glass of milk. But the moment you press a scoop of ice cream onto it, that soft crumb absorbs moisture and turns into a sad, gummy texture. Given a day to rest, the starches in the brownie firm up just enough to create a barrier. The ice cream stays cold and distinct, and the brownie stays chewy.
Plus, the flavor deepens overnight. The chocolate mellows out and gets a little more complex. It’s the same reason chili tastes better the next day — the ingredients stop fighting each other and settle into something unified. This is the version you want for a frozen treat that sits in the freezer for a week.
What Goes Into the Best Brownie Ice Cream Sandwiches
- Unsalted butter (1 cup, melted): I use melted butter here instead of creaming it with sugar. It makes the brownie dense and fudgy, which is exactly the texture we need to hold up against a scoop of ice cream. Marta always said melted butter gives baked goods a deeper flavor, and she was right.
- Dutch-process cocoa powder (3/4 cup): This is non-negotiable. It gives you that dark, almost fudge-like flavor. Natural cocoa is too acidic for this recipe — it makes the brownie taste sharp instead of rich. My kids don’t know the difference between cocoa powders, but I can always tell when someone skips this.
- Granulated sugar + brown sugar (1 cup each): The combo does two important things — the white sugar keeps the edges crispy, and the brown sugar keeps the center chewy and adds a little molasses depth. I tried using all brown sugar once and the brownies were too soft to hold their shape. Both sugars matter here.
- Eggs (3 large, room temperature): Cold eggs seize up melted butter. Let them sit on the counter for 20 minutes before you start. It takes barely any planning and it makes a real difference in how smooth the batter comes together.
- Vanilla extract (1 tablespoon): A generous pour. It rounds out the chocolate flavor and makes everything taste more finished. I use the good stuff here, not imitation.
- All-purpose flour (1 cup): Just enough to give the brownies structure without making them cakey. I’ve tested this with a gluten-free blend and it works — see the swaps section below.
- Salt (1/2 teaspoon) + baking powder (1/4 teaspoon): Salt balances the sweetness, and the tiny bit of baking powder keeps the brownies from turning into hockey pucks. Not enough to make them rise — just enough to keep them tender.
- Ice cream (2 pints): Use your favorite. We love a high-quality vanilla bean, but chocolate, coffee, or even strawberry works beautifully. Go for something with a higher fat content — it melts more slowly and holds up better in the freezer.
- Flaky sea salt (for finishing): A tiny sprinkle on top before serving cuts the sweetness and makes the chocolate taste even richer. This is optional but I almost never skip it.
Tools You’ll Actually Need
- A 9×13-inch baking pan — metal works better than glass for even baking
- Parchment paper — the overhang trick is your best friend here
- Large mixing bowl and a whisk — no stand mixer required
- Rubber spatula for folding
- Wire rack for cooling
- Sharp knife — a dull one will crush the brownie edges when you cut
- Plastic wrap for the overnight rest and freezer storage
Here’s How I Do It (Start the Day Before)
This goes fast. Read through once before you start, especially because the overnight rest is the most important step.
Preheat the oven: Set it to 350°F. Line your 9×13 pan with parchment paper, leaving an overhang on the two long sides. Those overhangs become handles later.
- Mix the wet ingredients: In a large bowl, whisk the melted butter and both sugars together until smooth. Add the eggs one at a time, whisking well after each, then add the vanilla. Whisk until the mixture is glossy and smooth — about one minute. Don’t overmix at this stage. Just until it comes together.
- Sift the dry ingredients: In a separate bowl, sift the cocoa powder, flour, salt, and baking powder together. (📸 Photo tip: The sifted cocoa should look like dark, fine dirt with no lumps or white streaks from the flour.)
- Fold them together: Pour the dry ingredients into the wet mixture. Use your rubber spatula to fold gently — scrape down the sides and bring the batter over itself. Stop as soon as you can’t see any more white streaks. You are trying to keep the air in, not beat it out. A few streaks are fine.
- Bake the brownies: Pour the batter into the prepared pan and spread it evenly. Bake for 25-28 minutes. A toothpick inserted into the center should come out with a few moist crumbs attached — not wet batter, but not completely clean either. That’s the sweet spot.
- Cool completely, then rest overnight: Let the brownie cool completely in the pan, then use the parchment handles to lift it onto a wire rack. Wrap it tightly in plastic wrap and let it sit on the counter for 24 hours. (📸 Photo tip: The wrapped brownie should look like a neat package — no exposed edges.) This is the hardest step. Plan for it. Your patience will be rewarded with a brownie that holds its shape beautifully.
- Soften the ice cream: The next day, let your ice cream sit at room temperature for 10-15 minutes to soften slightly. It should be spreadable but not melted. If it’s soupy, it will soak into the brownie.
- Assemble the sandwich: Cut the brownie slab in half crosswise so you have two equal rectangles. Place one half on a cutting board. Spread the softened ice cream evenly over the top with a spatula. Place the second brownie half on top and press down very gently — just enough to make contact.
- Freeze solid: Wrap the assembled sandwich tightly in plastic wrap and freeze for at least 4 hours, or overnight. (📸 Photo tip: The wrapped sandwich should look like a tidy brick — no gaps for freezer burn.)
- Slice and serve: Unwrap and cut into 12 even rectangles using a sharp knife. Sprinkle with flaky sea salt if you’re using it. Let the sandwiches sit at room temperature for 2-3 minutes before serving — it makes the brownie chewy again and the ice cream soft enough to bite through without squishing out the sides.
How I Meal Prep These for Summer Sundays
I make a double batch of brownies on Saturday, let them rest overnight, and assemble on Sunday afternoon. By Sunday dinner we have dessert ready for the whole week. The kids grab one from the freezer after school and by the time they’ve changed out of their uniforms, it’s ready to eat.
- Fridge: Not recommended — the ice cream will soften too much and the brownie will absorb moisture.
- Freezer: Wrap each individual sandwich in plastic wrap and store in a freezer bag for up to 3 months. They’re perfect for grabbing one at a time.
- Reheat: No reheating here! Just let the sandwich sit at room temperature for 2-3 minutes. The microwave will ruin the texture — trust me on that one.
Things I Learned the Hard Way (So You Don’t Have To)
- Use the parchment overhang. I skipped this once and spent twenty minutes trying to pry a brownie out of the pan. Never again. The overhang gives you handles that make lifting the whole slab out effortless.
- Let the ice cream soften, but don’t let it melt. Ten to fifteen minutes on the counter is perfect. If it’s soupy, it’ll soak into the brownie and undo all our hard work from the overnight rest. You want spreadable, not runny.
- Freeze the assembled sandwich solid before cutting. If you cut it too early, the ice cream will squish out the sides. A solid 4-hour freeze guarantees clean edges. I usually just leave it overnight and cut it the next day.
- A hot knife makes cleaner cuts. Run your knife under hot water, dry it off, and slice. Wipe the blade clean between each cut. It feels like an extra step, but the result is a dozen perfect little sandwiches with straight sides and no squished ice cream.
Make It Your Way — My Family’s Favorite Versions
- Gluten-Free: Use a 1:1 gluten-free flour blend. I’ve tested this with Cup4Cup and it works perfectly. Just make sure to let it rest overnight — gluten-free brownies are even more fragile when fresh and absolutely need that 24-hour set time.
- Dairy-Free: Use a high-quality dairy-free butter and your favorite oat or coconut milk-based ice cream. The overnight rest is critical here. Dairy-free baked goods tend to be more delicate, so handle the brownies gently during assembly.
- Mint Chocolate Chip: Add 1 teaspoon of peppermint extract to the brownie batter. It gives you that classic Thin Mint vibe with the vanilla ice cream. My oldest daughter requests this version for every sleepover.
- Peanut Butter Swirl: Warm 1/2 cup of creamy peanut butter and dollop it onto the ice cream layer before pressing the top brownie on. Use a knife to swirl it gently. My husband thinks this is the best version I’ve made — and he’s not usually a sweets person.
- Coffee Lover’s Version: Use coffee ice cream instead of vanilla and add 1 tablespoon of instant espresso powder to the brownie batter. It deepens the chocolate flavor and makes the whole thing taste a little more grown-up.
The Questions I Get About These Brownie Ice Cream Sandwiches
Q: Why did my brownie crack when I cut it?
A: It probably wasn’t rested long enough, or your knife was too dull. A full 24-hour rest lets the structure set properly. Use a long, sharp serrated knife and a gentle sawing motion. If you’re still having trouble, try freezing the assembled sandwich for an extra hour before cutting — it makes a big difference.
Q: Can I use a boxed brownie mix?
A: You can, but I don’t recommend it for this specific recipe. Boxed mixes are designed for a cakey, soft crumb that doesn’t hold up well to ice cream. You need a dense, chewy brownie here. The homemade version is really easy — I promise it’s worth the extra five minutes. If you really want to use a box, add an extra egg and use melted butter instead of oil, and still let it rest overnight.
Q: How long do these last in the freezer?
A: Wrapped well, they keep beautifully for up to 3 months. The brownie texture stays surprisingly good — the overnight rest helps it hold up to freezing without getting hard or icy. Just make sure each individual sandwich is sealed tightly in plastic wrap and stored in a freezer bag.
Q: What’s the best ice cream flavor for these?
A: Classic vanilla is my family’s favorite because it lets the brownie shine. But a high-quality coffee ice cream is incredible if you want something a little more grown-up. My kids love the chocolate version too, though I find the chocolate-on-chocolate can be a little intense. Strawberry is surprisingly good in the summer — it feels like a fancy ice cream shop dessert.
More Recipes My Family Asks For Again and Again
If you liked these brownie ice cream sandwiches, here are a few others that get the same reaction at our table:
- My Fudgy One-Bowl Brownies (No Mixer Required) — The base recipe that started it all. Richer than this version and perfect on their own.
- No-Churn Vanilla Bean Ice Cream (3 Ingredients) — My go-to when I want to make the whole thing from scratch. It freezes perfectly and tastes like real custard.
- The Chocolate Sheet Cake That Feeds a Crowd — The dessert I bring to every potluck. It travels well, feeds twelve people, and takes fifteen minutes to put together.
These brownie ice cream sandwiches are the height of summer around here — they’re messy, they’re cold, and they make everyone at the table smile. I love knowing that somewhere out there, someone is pulling one out of the freezer on a hot afternoon and taking that first bite.
If you try them, tag me on Pinterest or drop a comment below. I love seeing them come together in your kitchens — it’s the next best thing to having you over to share one.
📌 Brownie ice cream sandwiches that stay chewy and never go soggy — save this recipe for your next backyard party or lazy summer Sunday.
Chewy Brownie Ice Cream Sandwiches That Don’t Crack or Get Soggy — Finally
Equipment
- 9×13-inch Baking Pan
- Parchment Paper
- Large Mixing Bowl
- Whisk
- Rubber spatula
- Wire Rack
- Sharp Knife
- Plastic wrap
Ingredients
Brownie Batter
- 1 cup unsalted butter, melted
- 3/4 cup Dutch-process cocoa powder
- 1 cup granulated sugar
- 1 cup brown sugar
- 3 large eggs, room temperature
- 1 tablespoon vanilla extract
- 1 cup all-purpose flour
- 1/2 teaspoon salt
- 1/4 teaspoon baking powder
Ice Cream Layer
- 2 pints high-quality ice cream (vanilla or favorite flavor)
- Flaky sea salt, for finishing (optional)
Instructions
- Preheat the oven to 350°F. Line a 9×13-inch baking pan with parchment paper, leaving an overhang on the two long sides.
- In a large bowl, whisk the melted butter and both sugars until smooth. Add the eggs one at a time, whisking well after each, then add the vanilla. Whisk until glossy and smooth, about 1 minute.
- In a separate bowl, sift together the cocoa powder, flour, salt, and baking powder.
- Pour the dry ingredients into the wet mixture. Fold gently with a rubber spatula until just combined and no streaks remain. Do not overmix.
- Pour the batter into the prepared pan and spread evenly. Bake for 25–28 minutes, until a toothpick inserted in the center comes out with a few moist crumbs attached.
- Let the brownie cool completely in the pan, then lift it out using the parchment handles. Wrap tightly in plastic wrap and let rest on the counter for 24 hours. This is critical for texture.
- The next day, soften the ice cream at room temperature for 10–15 minutes until spreadable but not melted.
- Cut the brownie slab in half crosswise. Place one half on a cutting board. Spread the softened ice cream evenly over the top. Place the other brownie half on top and press gently.
- Wrap the assembled sandwich tightly in plastic wrap and freeze for at least 4 hours, or overnight, until solid.
- Unwrap and cut into 12 rectangles using a sharp knife. Sprinkle with flaky sea salt if desired. Let sit at room temperature 2–3 minutes before serving.
Notes
Related posts:
 The Slow Cooker Cowboy Casserole That Saves Tired Weeknights (No Soggy Tots Allowed)
 Lemon Garlic Butter Baked Salmon in Foil That’s Ready in 25 Minutes — No Fuss, No Mess
 Moist Chocolate Zucchini Bread That Doesn’t Turn Out Rubbery — Finally
 Creamy Homemade Strawberry Dole Whip (That Tastes Just Like the Real Thing)
 Blueberry Peach Bread That Doesn’t Sink or Turn Mushy — Finally
 Quinoa Chicken Sausage Bowls That Are Ready in 30 Minutes (And Actually Keep Well)