
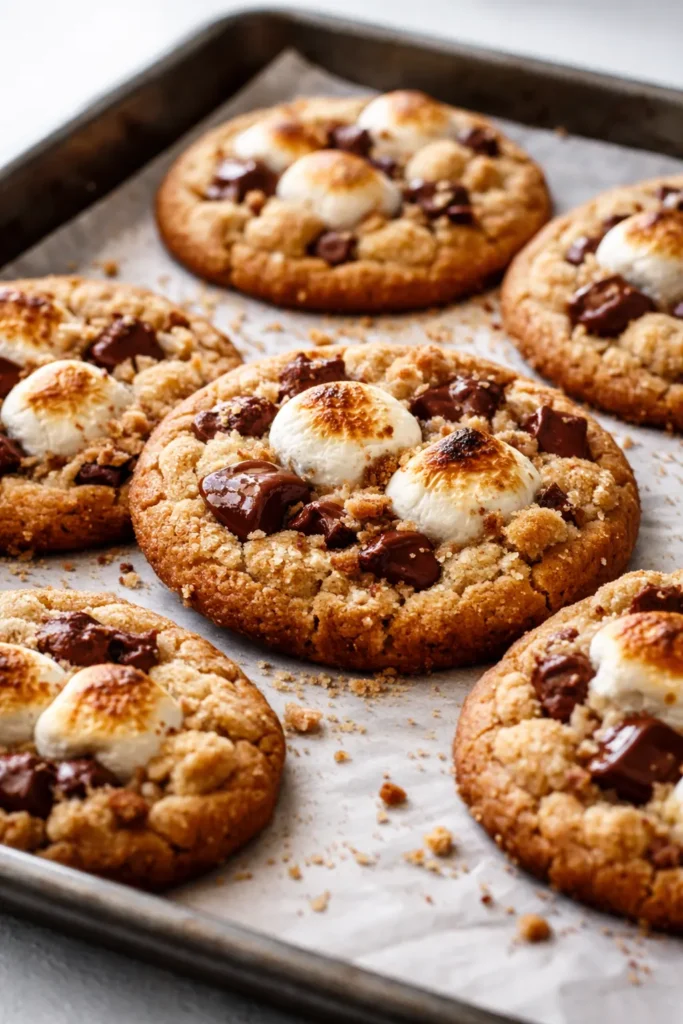
There’s a moment right under the broiler when the marshmallow starts to brown — it goes from white to toasted in about 45 seconds, and the kitchen smells like the first night of summer vacation. That’s when I know these are ready. My kids hover around the oven door waiting for that exact smell, and honestly, so do I.
The short version: A soft, buttery graham cracker cookie base topped with dark chocolate and a perfectly toasted marshmallow — no campfire required, done in 30 minutes.
I’ve tested this smores cookies recipe about a dozen times to get the ratio right. The cookie can’t be too thin or the toppings overwhelm it. The marshmallow needs to puff without melting into a puddle. The chocolate should be melted but not burnt. My nine-year-old, who usually picks the marshmallows out of everything, ate three of these in one sitting and asked if we could have them for breakfast. (The answer was no, but I thought about it.)
- Serves: 12-14 cookies
- Hands-On Time: 20 min | Total Time: 30 min
- Difficulty: Easy — the broiler is the only tricky part, and I’ll walk you through it
- Cost per serving: About $0.75 per cookie
- Calories: ~280 per cookie
- Dietary Notes: Easily adaptable for gluten-free
(Photo above: Overhead shot of a single s’mores cookie on a worn wooden plate, pulled apart to show the stretchy marshmallow web and melted dark chocolate, golden-brown edges visible, warm afternoon light from the side.)
What Makes These Different from Every Other S’mores Cookie I’ve Tried
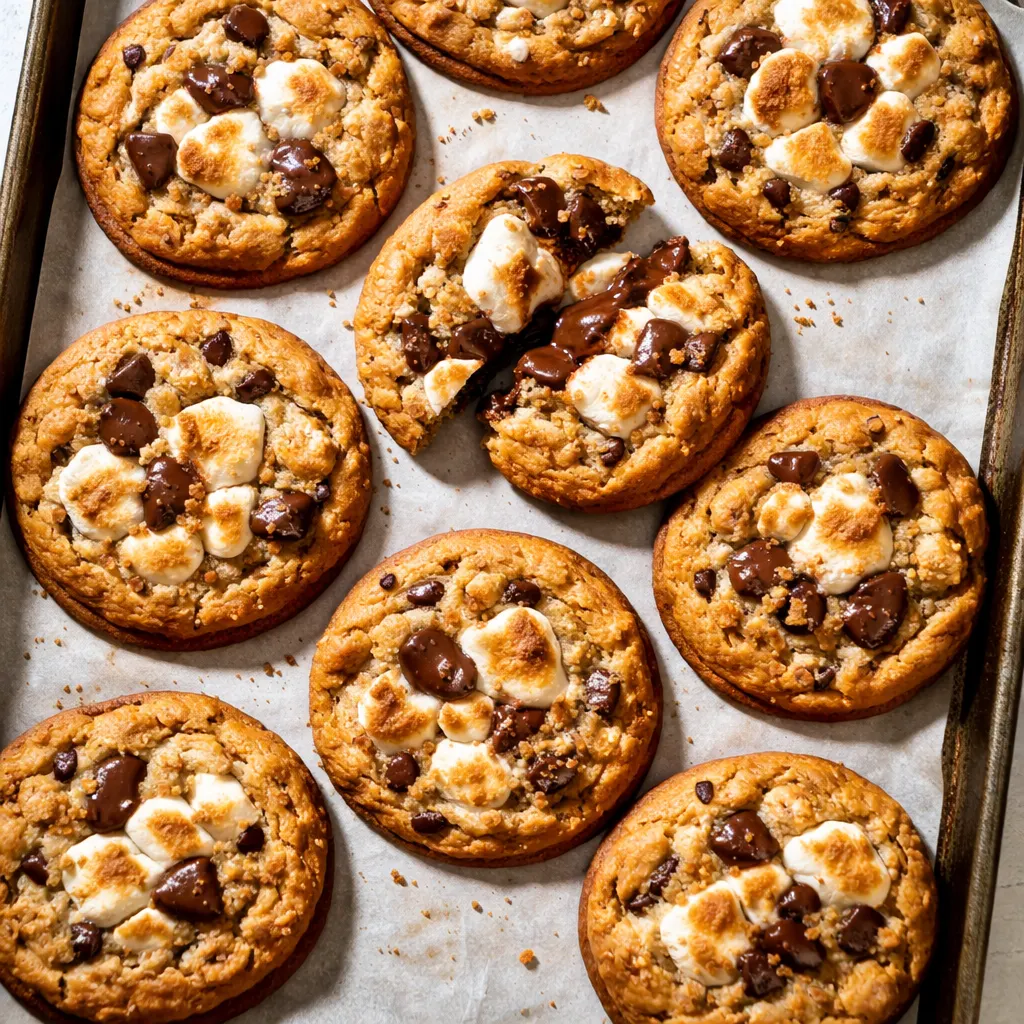
The problem with most smores cookies recipes is structural. The cookie spreads too thin, the marshmallow melts into a sugary puddle, and the chocolate burns before anything else happens. You end up with a flat, sticky mess that tastes like sugar and regret.
I wanted a cookie that could hold its own — something with enough body to support the toppings, with a flavor that reminded me of the graham cracker part of the s’more, not just the sugary middle. The trick ended up being simple: grind half a sleeve of graham crackers right into the flour. It gives the dough a sandy, tender texture that doesn’t spread too much under the heat, and it tastes like the campfire version of a cookie.
The second trick is timing. The cookie bakes almost all the way through before the toppings go on. Then the chocolate and marshmallow hit the heat for just long enough to soften and toast. It’s two stages instead of one, but it makes all the difference.
Everything You Need (And a Few Notes From Me)
- 1 ½ cups all-purpose flour: Spoon and level it — scooping straight from the bag packs it too tight and makes the cookie dense.
- 1 cup graham cracker crumbs (about 1 sleeve): I crush them in a zip-top bag with a rolling pin. It’s loud and satisfying, and my kids fight over who gets to do it. Don’t use store-bought crumbs — they’re too fine and the cookie loses its texture.
- ½ teaspoon baking soda: Helps the cookie puff just enough without spreading.
- ½ teaspoon salt: I use kosher. It balances the sweetness from the marshmallow and chocolate.
- ½ cup unsalted butter, softened: Room temperature — not melted, not cold. If you forgot to set it out, cut it into cubes and let it sit for 10 minutes.
- ¾ cup light brown sugar, packed: Light brown sugar keeps the cookie soft. Dark brown works too but gives it a molasses flavor that competes with the graham cracker.
- ¼ cup granulated sugar: Just enough to help the edges crisp.
- 1 large egg: Room temperature. I set mine in a bowl of warm water for 5 minutes if I’m in a hurry.
- 1 teaspoon vanilla extract: Pure, not imitation. It rounds out the brown sugar.
- 12-14 large marshmallows: Full-size, not mini. Mini marshmallows melt too fast. You want a big puff that browns on top while staying gooey underneath.
- 12-14 thick squares of dark or milk chocolate: I use a good-quality semi-sweet bar, but Hershey’s works if you want the real campfire flavor. The chocolate needs to be thick enough to stay solid for the first minute under the broiler.
What to Pull Out Before You Start
- Baking sheet — I use a rimmed half-sheet pan lined with parchment paper
- Stand mixer or hand mixer (a wooden spoon works too, but your arm will thank you for the mixer)
- Medium cookie scoop (about 2 tablespoons)
- Rolling pin or zip-top bag for crushing graham crackers
- Kitchen torch (optional, but helpful if you’re nervous about the broiler)
Let’s Make Them (Step by Step)
This goes fast once you start, so read through once and set everything out. The oven does most of the work.
Preheat and prep: Set your oven to 350°F. Line a baking sheet with parchment paper.
- Crush the graham crackers: Place one sleeve of graham crackers in a zip-top bag and crush them with a rolling pin until you have fine crumbs mixed with a few small pebbly pieces. You want texture, not dust. Measure out 1 cup. (📸 Photo tip: The crumbs should look like coarse sand with a few tiny chunks.)
- Mix the dry ingredients: In a medium bowl, whisk together the flour, graham cracker crumbs, baking soda, and salt. Set aside.
- Cream the butter and sugars: In the bowl of a stand mixer fitted with the paddle attachment, beat the softened butter, brown sugar, and granulated sugar on medium speed until light and fluffy — about 3 minutes. Scrape down the sides of the bowl.
- Add the egg and vanilla: Beat in the egg and vanilla on low speed until combined. The mixture might look slightly curdled — that’s fine.
- Combine wet and dry: Add the dry ingredients to the wet ingredients in two additions, mixing on low speed just until no streaks of flour remain. Don’t overmix, or the cookies will be tough.
- Chill the dough: This is non-negotiable. Cover the bowl and refrigerate for at least 20 minutes. Warm dough spreads into a single thin disc. Chilled dough stays thick, which is what you need to support the toppings. (📸 Photo tip: The dough should be firm enough to scoop cleanly without sticking to your fingers.)
- Scoop and bake (first stage): Scoop rounded tablespoons of dough onto the prepared baking sheet, spacing them about 2 inches apart. Bake at 350°F for 8-9 minutes — the edges should be set and lightly golden, but the centers will still look soft and slightly underdone. They’ll finish setting as they cool.
- Add the toppings: Remove the baking sheet from the oven. Gently press a square of chocolate into the center of each cookie, then top with a marshmallow, pressing down lightly so it sticks.
- Broil (second stage): Switch the oven to broil. Place the baking sheet back in the oven on the middle rack (not too close to the heating element). Broil for 45-60 seconds — watch constantly. The marshmallow will puff up and develop brown spots, and the chocolate will soften. Pull them the second you see color on the marshmallow. Do not walk away. This is the moment that makes or breaks the cookie. (📸 Photo tip: The marshmallow should be puffed and golden-brown on top, with the chocolate just starting to melt at the edges.)
- Cool and serve: Let the cookies cool on the baking sheet for exactly 5 minutes before moving them to a wire rack. The marshmallow is dangerously hot and stretchy at first — moving them too early turns everything into a stringy mess. After 5 minutes, they’re ready to eat.
How I Meal Prep These for the Week
These are absolutely best fresh out of the oven, but I still find ways to get ahead. On Sunday afternoons, I make a double batch of dough and freeze the scooped balls. When a craving hits — and it always does — I bake them straight from frozen. The toppings go on fresh because a reheated marshmallow just isn’t the same, but the hard part is already done.
- Fridge: Baked cookies (without toppings) can be stored in an airtight container for up to 3 days. Add the toppings and broil when ready to serve.
- Freezer: Scooped dough balls freeze beautifully for up to 3 months. Bake straight from frozen, adding 2-3 minutes to the first bake stage.
- Reheat: Toaster oven at 350°F for 5 minutes brings the cookie back to life without burning the marshmallow. Do not microwave — it turns the marshmallow into foam.
Things I Wish I’d Known the First Time
- Don’t walk away from the broiler. I cannot say this enough. The difference between perfectly toasted and burnt is about 15 seconds. I stand right in front of the oven and pull the tray the second I see the first brown spot. Every oven is different, so trust your eyes, not the timer.
- The chill step matters more than you think. Warm dough spreads. Chilled dough stays thick. I tested these with warm dough once, and the cookies spread so thin that the marshmallow slid right off. Chilling the dough for at least 20 minutes keeps everything where it belongs.
- Use a kitchen torch if the broiler makes you nervous. I bought a small culinary torch for crème brûlée, and now I use it for these cookies all the time. It gives you total control — you can toast the marshmallow exactly as much as you want without worrying about the chocolate burning.
- Let them cool on the pan. I know it’s hard to wait when the kitchen smells like a campfire, but those 5 minutes on the baking sheet are crucial. The marshmallow sets just enough to hold its shape, and the chocolate firms up slightly so it doesn’t burn your mouth. I’ve made the mistake of moving them too early. Don’t be like me.
Even if you mess one of these up — if the marshmallow gets a little too dark or the cookie spreads a tiny bit — they’ll still taste good. I’ve eaten plenty of “imperfect” ones straight off the sheet tray, and they were still gone in ten minutes.
Swaps That Actually Work
- Gluten-Free: Use a 1:1 gluten-free flour blend (I like King Arthur Measure for Measure) and gluten-free graham crackers. Everything else stays the same — the recipe adapts beautifully. This is the version I make when my sister visits, and she says she can’t tell the difference.
- Peanut Butter S’mores: Press a mini peanut butter cup into the center of the cookie before adding the chocolate and marshmallow. It sounds indulgent, and it is, but it’s also the most requested version at our house.
- Kid-Friendly: Use milk chocolate instead of dark, and let them toast the marshmallows with a kitchen torch (under supervision, of course). My kids love feeling like they’re in charge of the “fire.”
- Fancy Guest Version: Use a high-quality dark chocolate bar (70% cacao) and a flaky sea salt sprinkle on top right after broiling. It sounds fancy, but it’s just a pinch of salt — it makes the chocolate taste deeper and cuts the sweetness.
Questions I Get About This Recipe All the Time
Q: Why did my marshmallow melt into a puddle?
A: Ugh, I’ve been there. It usually happens when the oven is too hot or the broiler is too close. Make sure your cookies are fully baked during the first stage — they shouldn’t need more than a minute or two under the broiler. If your marshmallows are still melting, try moving the rack down one level and increasing the broil time by 15-20 seconds.
Q: Can I use marshmallow fluff or mini marshmallows?
A: I don’t recommend it. Fluff turns into a hard, sugary shell under the broiler, and mini marshmallows melt before they have a chance to toast. A full-size marshmallow gives you that perfect contrast — gooey center, toasty crust. It’s worth using the real thing.
Q: How long do these last? Can I freeze them?
A: Baked and topped cookies are best within a few hours — the marshmallow starts to get tough after that. If you want to get ahead, freeze the scooped dough balls (without toppings) for up to 3 months. I keep a bag in my freezer at all times for emergency cookie situations.
Q: What do you serve with these?
A: Ice-cold milk — it’s the only thing that makes sense. But if you want to go all out, sandwich a scoop of vanilla ice cream between two cookies. My kids call it an “ice cream s’more,” and it’s the reason we have dessert on summer Fridays.
More Recipes My Family Makes on Repeat
If you loved these, here are a few others that get the same level of enthusiasm at our table. They’re all tested, tweaked, and totally worth the butter.
- Chewy Brown Sugar Cookies — The cookie base I use when I don’t have graham crackers on hand
- No-Churn Vanilla Ice Cream — The perfect partner for an ice cream s’more sandwich
- Campfire Banana Boats — Another campfire classic, oven-friendly and just as nostalgic
These are the cookies we make on the nights when summer is just barely holding on — the ones that smell like campfires and make the kitchen feel like a Friday night. I hope they become a part of your late-night rotation, too. If you make them, drop a comment below and tell me about the minute the marshmallow hit the broiler. I love hearing how it goes for you.
📌 Save this smores cookies recipe for your next warm night when only a campfire treat will do — the one with the gooey marshmallow and the cookie that doesn’t quit.
S’mores Cookies
Equipment
- Baking Sheet
- Stand mixer or hand mixer
- Medium Cookie Scoop
- Rolling Pin or Zip-Top Bag
Ingredients
For the Cookies
- 1 1/2 cups all-purpose flour, spooned and leveled
- 1 cup graham cracker crumbs (about 1 sleeve, crushed)
- 1/2 teaspoon baking soda
- 1/2 teaspoon kosher salt
- 1/2 cup unsalted butter, softened
- 3/4 cup light brown sugar, packed
- 1/4 cup granulated sugar
- 1 large egg, room temperature
- 1 teaspoon vanilla extract, pure
- 12-14 large marshmallows (full-size)
- 12-14 squares thick dark or milk chocolate (e.g. Hershey’s or 70% cacao bar)
Instructions
- Preheat oven to 350°F. Line a baking sheet with parchment paper.
- Crush the graham crackers: Place one sleeve in a zip-top bag and crush with a rolling pin until you have fine crumbs with small pebbly pieces. Measure out 1 cup.
- In a medium bowl, whisk together flour, graham cracker crumbs, baking soda, and salt. Set aside.
- In the bowl of a stand mixer (or using a hand mixer), beat softened butter, brown sugar, and granulated sugar on medium speed until light and fluffy, about 3 minutes. Scrape down sides.
- Beat in egg and vanilla on low speed until combined. Mixture may look slightly curdled.
- Add dry ingredients in two additions, mixing on low just until no streaks of flour remain. Do not overmix.
- Cover bowl and refrigerate dough for at least 20 minutes. This is essential to prevent spreading.
- Scoop rounded tablespoons of dough onto prepared baking sheet, spacing 2 inches apart. Bake at 350°F for 8-9 minutes – edges should be set and lightly golden, centers still soft.
- Remove from oven. Gently press a chocolate square into center of each cookie, then top with a marshmallow, pressing lightly to stick.
- Switch oven to broil. Return baking sheet to middle rack. Broil for 45-60 seconds, watching constantly, until marshmallow puffs and develops brown spots. Pull immediately.
- Let cookies cool on baking sheet for exactly 5 minutes before transferring to wire rack. Serve warm.
Notes
Related posts:
 The Slow Cooker Cowboy Casserole That Saves Tired Weeknights (No Soggy Tots Allowed)
 Lemon Garlic Butter Baked Salmon in Foil That’s Ready in 25 Minutes — No Fuss, No Mess
 Moist Chocolate Zucchini Bread That Doesn’t Turn Out Rubbery — Finally
 Creamy Homemade Strawberry Dole Whip (That Tastes Just Like the Real Thing)
 Blueberry Peach Bread That Doesn’t Sink or Turn Mushy — Finally
 Quinoa Chicken Sausage Bowls That Are Ready in 30 Minutes (And Actually Keep Well)