
The first time I made this iced vanilla matcha latte at home, I actually gasped a little. Not because it was complicated — it’s not, it’s five minutes from start to finish — but because it tasted exactly like the one I’d been paying seven dollars for every afternoon. That same velvety sweetness, that same clean green finish, that same little thrill of watching the matcha cloud into the milk. My daughter Nora came home from Savannah for the weekend, took one sip, and said, “Mom, why have we been buying these?” She wasn’t wrong.
The short version: This creamy iced vanilla matcha latte comes together in five minutes with real ingredients and saves you about six dollars every single time you make it.
I’ve made this drink roughly eleventy billion times since that first afternoon — through the chaos of school mornings, lazy Sunday reading sessions on the porch, and a stretch of late-summer afternoons where I honestly thought about keeping a pitcher of it in the fridge at all times. It’s become the thing I make when I need a minute. The mixing is meditative, the result is genuinely better than anything I’ve ordered out, and my nineteen-year-old requests it by name when she calls home.
- Serves: 1 tall glass (easily doubled)
- Hands-On Time: 5 min | Total Time: 5 min
- Difficulty: Easy enough for a Tuesday morning before coffee
- Cost per serving: About $1.75 (vs. $7 at a coffee shop)
- Calories: ~180 per serving (with 2% milk and 1 tbsp honey)
- Dietary Notes: Naturally gluten-free; easily dairy-free and vegan
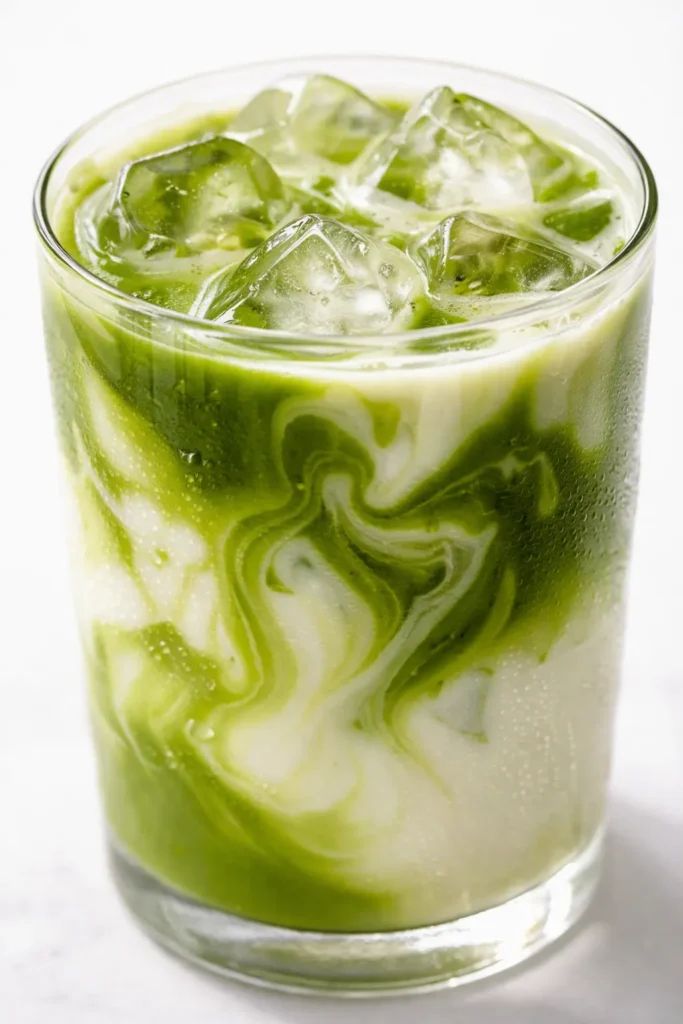
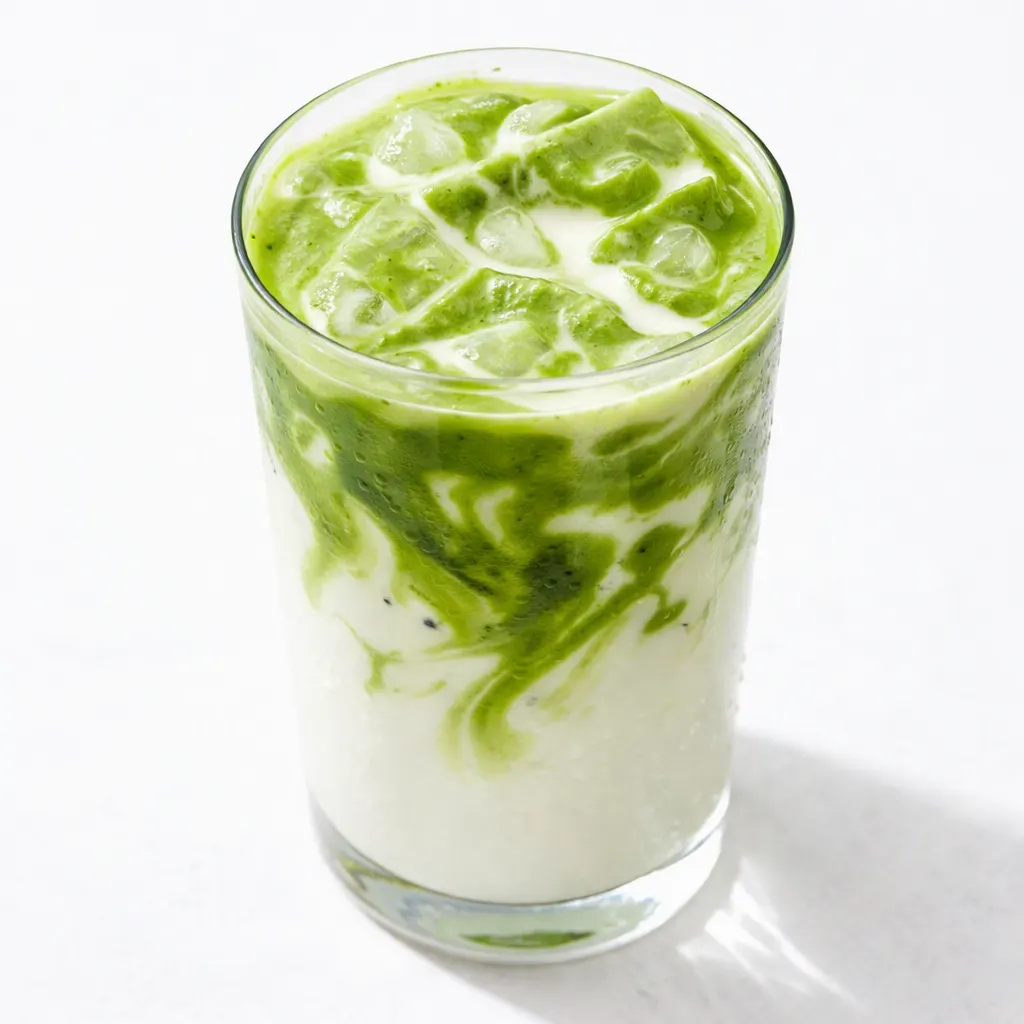
(Photo above: a tall glass of iced vanilla matcha latte on a worn wooden kitchen counter, shot from a slight angle so you can see the three distinct layers — white milk at the bottom, brilliant green matcha settling on top, and a faint swirl of honey catching the morning light. A small whisk rests on a saucer beside the glass, and the window behind shows soft, unfiltered sunlight.)
Why This Beats the Coffee Shop Version Every Single Time
The thing that separates a truly good iced vanilla matcha latte from a mediocre one isn’t the matcha itself — though quality matters, and I’ll get to that in a minute. It’s the order of operations. Every coffee shop I’ve ever watched make one does it the same way: they dump everything in a cup, stir it once, and hand it over. The matcha never fully dissolves. You get these sad little clumps of green powder floating around, and by the time you reach the bottom of the glass, the last sip tastes bitter and slightly gritty.
My version takes one extra 30-second step that changes everything: I whisk the matcha with a splash of water first, turning it into a smooth, glossy paste, before I ever touch the milk. This is the step that keeps your latte silky from the first sip to the last. No clumps, no bitter surprise at the bottom, no stirring your drink with a straw every two minutes because the matcha sank and settled.
I learned this the hard way after way too many disappointing homemade attempts. The first few times I tried to make one at home, I just shook everything together in a jar and hoped for the best. It was… fine. Drinkable. But it wasn’t the thing I was craving. The day I started whisking the matcha separately was the day I stopped buying them out entirely.
What Goes In — Plus My Honest Notes
- 1 teaspoon ceremonial-grade matcha powder: This is the ingredient where you can’t cut corners. Culinary-grade matcha works for baking, but it’s too bitter for drinking straight. Ceremonial grade is smoother, sweeter, and brighter. I buy mine from a small tea company online and keep it in the fridge — matcha goes stale fast and loses that gorgeous green color if you leave it in the pantry.
- 2 tablespoons hot water (not boiling): Just enough to dissolve the matcha into a smooth paste. Water that’s too hot will scorch the matcha and make it taste bitter and flat. You want it warm — the temperature of a comfortable bath, not a scalding shower.
- 1 cup milk of your choice: Whole milk makes it the creamiest. Oat milk is my personal favorite for the slightly sweet, almost nutty flavor it adds. Almond milk works but makes a thinner drink. My nephew who can’t do dairy has tried this with every milk alternative on the market, and oat milk is the one he says “doesn’t taste like a compromise.”
- 1 tablespoon honey: Honey dissolves more easily than sugar in cold drinks if you stir it into the milk before adding the ice. My kids can smell the difference when I use maple syrup instead — they say it changes the whole vibe of the drink. Use honey.
- 1/2 teaspoon vanilla extract: Real vanilla, not the imitation stuff. It adds a warmth that rounds out the grassy notes of the matcha. I started adding vanilla when a barista did it without asking and I never went back — it’s the little thing that makes this taste like a “treat” instead of just tea with milk.
- 1 cup ice: The more the better. This drink is meant to be aggressively cold — the contrast between the cold milk and the bright green matcha layer is half the experience.
What to Pull Out Before You Start
- A matcha whisk (chasen) or a small regular whisk: A bamboo chasen is traditional and works beautifully, but a tiny regular whisk does the job. I’ve even used a fork in a pinch — it takes a little longer but it gets there.
- A small bowl for whisking: Just big enough to hold the matcha and water without splashing everywhere.
- A tall glass or mason jar: You want something you can see through — half the joy of this drink is watching the green layer settle over the white milk like a slow sunset in reverse.
- A measuring spoon: Matcha is potent. A level teaspoon is the right amount — a heaping one will tip into bitterness.
Here’s How I Do It — No Barista Skills Required
This goes fast, so read through once before you start. Once you’ve made it twice, you’ll be able to do it with your eyes closed — which is honestly how I make most of mine these days.
Whisk the matcha: Measure the hot water into a small bowl and add the matcha. Whisk vigorously in a zigzag motion (not circular — the zigzag is what creates that frothy layer on top) until the matcha is completely dissolved and the mixture is smooth and glossy. You should see a layer of fine bubbles on top.
- Mix the honey and vanilla into your milk: In your tall glass, stir the honey and vanilla into the cold milk until the honey is fully dissolved. Take a taste here — it should be sweet and creamy with just a hint of vanilla warmth. This is the base of the whole drink, so it needs to taste right before anything else happens. (This is the step I do in a small measuring cup if I’m making two — one for me, one for whoever wandered into the kitchen.)
- Add the ice: Fill the glass to the top with ice. Don’t skimp — you want this drink aggressively cold, and the ice also creates the separation layer that makes this so pretty. (📸 Photo tip: this is the moment to notice the mise en place — the glass full of ice, the golden honey-milk waiting, the bowl of green matcha. It looks like a little kitchen still life.)
- Pour the matcha over the ice: Slowly pour the whisked matcha over the top of the ice. It will pool over the ice cubes and slowly settle down through the milk, creating that gorgeous gradient from bright green at the top to creamy white at the bottom. Don’t stir it yet. (📸 Photo tip: this is your money shot. The matcha layers over the white milk, swirling slightly as it settles. I always hold my glass up to the window for this part — the light through the green is genuinely beautiful.)
- Give it one gentle spin (or don’t): When you’re ready to drink, give the glass one slow stir with a long spoon to blend everything together, or leave it layered and let each sip pull up more milk as you go. Both ways are correct. I usually give it one spin, then let the rest happen naturally as I drink.
That’s it. Five minutes, three layers, better than anything behind a counter.
How I Meal Prep These for the Week
Matcha doesn’t hold up well mixed — it oxidizes and turns an unappetizing brownish-green after a few hours — but you can absolutely prep the pieces. I make a batch of the honey-vanilla milk on Sunday nights and keep it in a jar in the fridge. Then each morning, I only have to whisk a teaspoon of matcha and pour. We’re set until Thursday without the drink ever tasting stale. The milk gets sweeter as the honey and vanilla hang out together, which is honestly a bonus.
- Fridge: Honey-vanilla milk keeps in a sealed jar for up to 5 days. Matcha, once whisked with water, is best used within 15 minutes. Whisk it fresh each time.
- Freezer: Not recommended — milk changes texture when frozen and matcha doesn’t improve with time. This is a fresh-drink recipe, and that’s part of its charm.
- Reheat: You’re not reheating this one — but if you want a hot version, just warm the honey-vanilla milk gently on the stove or in the microwave, add the whisked matcha, and you’ve got a 2-minute hot vanilla matcha latte for winter mornings.
Things I Wish I’d Known the First Time
- Cheap matcha is a false economy: I know — a $20 tin of ceremonial matcha feels like a lot. But you’re using one teaspoon at a time, and a tin lasts me about a month. Compare that to three or four coffee-shop lattes a week, and the math stops being close. Cheap matcha doesn’t just taste bitter — it’s dull. It makes a murky, flat drink that you’ll convince yourself is fine because you spent money on it. Don’t. Spend the extra seven dollars. You’ll taste the difference in the very first sip.
- The zigzag whisking pattern actually matters: I first learned this from a tea shop owner and thought it was a little precious. Then I tried it side by side. Circular whisking leaves the matcha slightly clumpy at the bottom of the bowl — the zigzag breaks up the clumps and creates that fine, silky froth. It takes three extra seconds. Just do the zigzag.
- Hot water from the tap is a trap: Tap water can carry mineral flavors that mute the matcha. I use filtered water warmed in the kettle, and the difference is subtle but real. If you don’t have a filter, just use cold water heated in the microwave for 20 seconds — you don’t need a lot.
- Even if you mess this up a little, it’s still good: Maybe your matcha is slightly clumpy. Maybe your honey didn’t fully dissolve. Maybe you used almond milk and it’s a little thin. It’s still a sweet, creamy, pick-me-up drink that you made in your own kitchen for a fraction of the cost. I’ve made every version of the mistakes — the drink has always been drinkable. Perfection is a moving target, but this recipe is forgiving.
Swaps That Actually Work
- Dairy-Free: Oat milk is my top pick — it’s creamy enough to hold its own against the matcha and it has a natural sweetness that plays beautifully with the honey. This is the version I make for my sister-in-law every time she visits — she’s dairy-free and she always asks for seconds.
- Vegan: Swap the honey for maple syrup or agave. Maple syrup changes the flavor slightly — it’s a little more caramel-y and rustic — but it’s genuinely delicious. Just add it to the milk like you would the honey.
- Less Sweet: Cut the honey down to 2 teaspoons. The drink will be more matcha-forward and a little more grassy. My husband prefers this version — he says the full tablespoon tastes like dessert, and he wants his afternoons to feel less like cake.
- Hot Version: Skip the ice, warm the milk with the honey and vanilla, and pour the whisked matcha over it. It’s the winter cousin to this drink, and it’s just as comforting in January as this one is in July.
- Extra Treat: Add a splash of vanilla syrup — the kind you’d use for iced coffee — on top of the latte. It adds a silkiness that pushes this firmly into “dessert drink” territory. I save this one for Friday afternoons.
Before You Start: The Questions I Wish I’d Asked
Q: Why did my matcha turn out bitter and murky instead of smooth and sweet?
A: Ugh, I’ve been there. Bitter matcha almost always means one of two things: you used hot water that was too hot, or you used a heaping spoonful instead of a level one. Water that’s hotter than 175°F scorches the delicate leaves and brings out all the bitter compounds. Let your water sit for a full minute after boiling before you use it — you want warm, not hot. And level your teaspoon. Matcha is concentrated, and a little extra is the difference between balanced and headache-inducing. You’ve got this next time — these are easy fixes.
Q: Can I make this with a milk alternative like almond milk?
A: Yes, but know what you’re getting. Almond milk is thinner and won’t create that luxurious, almost milkshake-like texture you get from whole milk or oat milk. The flavor still works — the honey and vanilla cover the almond notes nicely — but the drink will feel lighter and more refreshing than creamy. If you want the full experience with a non-dairy option, oat milk is the one that gets closest to the real thing. I’ve tested both and I keep a carton of oat milk in the fridge specifically for this.
Q: How long does this latte last? Can I make a big batch ahead of time?
A: This is a fresh-drink situation, and I say that with love. The matcha, once mixed with liquid, starts to oxidize within about 15 minutes — it turns a muddier green and picks up a slightly stale, flat taste. That said, you can absolutely prep the honey-vanilla milk ahead of time. It keeps in a sealed jar in the fridge for up to 5 days, so the morning routine becomes just whisking your teaspoon of matcha and pouring. The milk actually gets better as the flavors meld together. If you need a full batch for a brunch or gathering, keep the matcha separate and whisk it right before serving.
Q: What do you serve with an iced vanilla matcha latte?
A: This is the drink I make for slow weekend mornings, so I’m partial to serving it with something slightly sweet and a little buttery. A slice of my brown butter banana bread is my absolute favorite pairing — the nuttiness of the brown butter and the clean, grassy finish of the matcha are made for each other. If it’s more of an afternoon treat, I’ll have it with lemon shortbread cookies or just a handful of dark chocolate almonds. My daughter always grabs a slice of my overnight oats on her way out the door — she says the latte makes it feel like a café breakfast even on a Tuesday.
More Recipes My Family Makes on Repeat
If you liked this one, here are a few others that get the same reaction at our table:
- Creamy Lemon Garlic Sheet Pan Salmon — The weeknight dinner that makes my husband think I planned ahead when I absolutely did not.
- Fluffy Buttermilk Biscuits — The recipe my daughter calls home about every single time she has a stressful week.
- No-Churn Vanilla Bean Ice Cream — Summer in a bowl, and it freezes beautifully if you somehow don’t eat it all in one day.
The moment the green settles into the white milk, before you take the first sip — that’s the moment this drink stops being a recipe and starts being a ritual. A little pocket of calm in a busy day, made by your own hands in less time than it takes to stand in line. That’s the thing worth saving.
If you try it, come back and tell me how it went — I love hearing which milk people land on and whether the honey-vanilla combo does it for them too. You can tag me on Pinterest or leave a comment below, and I’ll see it either way.
📌 This five-minute iced vanilla matcha latte recipe tastes like the coffee shop version for a fraction of the price — save it for your next slow morning at home.
Iced Vanilla Matcha Latte
Equipment
- Matcha whisk (chasen)
- Small bowl
- Tall Glass or Mason Jar
- Measuring spoons
Ingredients
Matcha Base
- 1 teaspoon ceremonial-grade matcha powder
- 2 tablespoons hot water, not boiling
Honey-Vanilla Milk Base
- 1 cup milk of choice (whole or oat milk are best)
- 1 tablespoon honey
- 1/2 teaspoon vanilla extract
To Assemble
- 1 cup ice
Instructions
- Whisk the matcha: add the hot water to a small bowl and whisk the matcha in a zigzag motion until smooth and glossy, with fine bubbles on top.
- Mix the honey and vanilla into the cold milk in a tall glass. Taste it here – it should be sweet and creamy with a hint of vanilla warmth.
- Fill the glass to the top with ice.
- Slowly pour the whisked matcha over the ice and watch it layer over the milk. Do not stir yet.
- Give the drink one slow stir before sipping, or leave it layered and let each sip pull up more milk.
Notes
Related posts:
 The Slow Cooker Cowboy Casserole That Saves Tired Weeknights (No Soggy Tots Allowed)
 Lemon Garlic Butter Baked Salmon in Foil That’s Ready in 25 Minutes — No Fuss, No Mess
 Moist Chocolate Zucchini Bread That Doesn’t Turn Out Rubbery — Finally
 Creamy Homemade Strawberry Dole Whip (That Tastes Just Like the Real Thing)
 Blueberry Peach Bread That Doesn’t Sink or Turn Mushy — Finally
 Quinoa Chicken Sausage Bowls That Are Ready in 30 Minutes (And Actually Keep Well)