
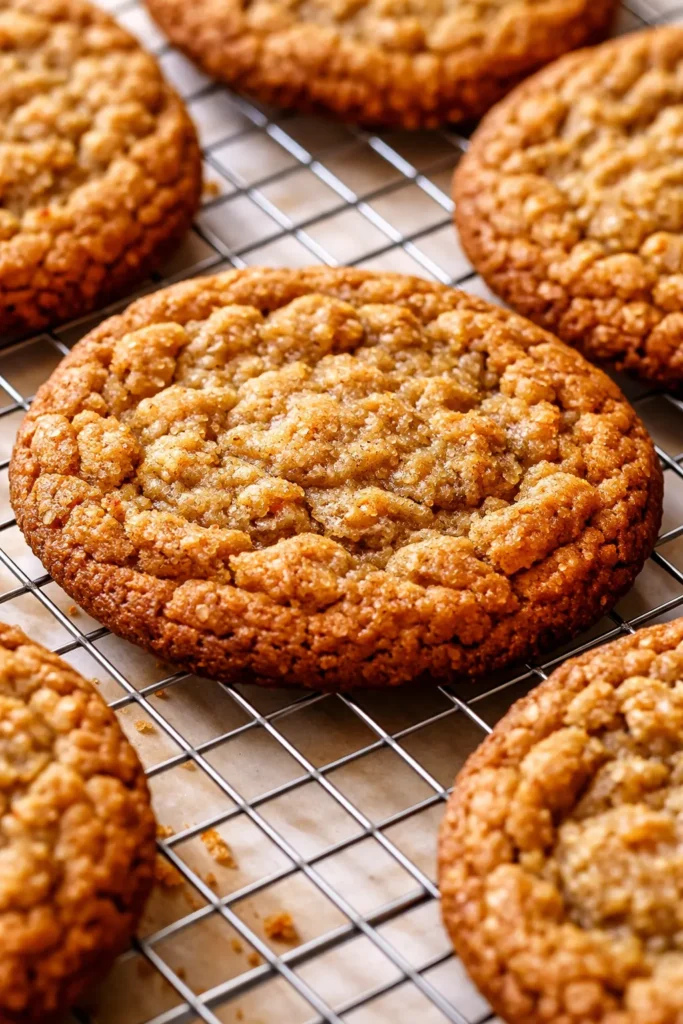
That first bite of a warm Biscoff oatmeal cookie — the caramelized spice hits you before the chew does — and suddenly you’re wondering why you’ve been buying them from the store. These are the ones my daughter Nora texts me about from college, asking if I can mail a batch. I’ve made this recipe at least a dozen times, tweaking the ratio until the edges were crisp and the centers stayed soft for days.
The short version: These cookies come together in 30 minutes with pantry staples, and my kids have already asked for them three times this week.
My husband, who claims he “doesn’t like oatmeal cookies,” ate six of these before I could even photograph them. That’s the kind of test that doesn’t lie.
- Serves: 24 cookies
- Hands-On Time: 10 min | Total Time: 30 min
- Difficulty: Easy enough for a school-night bake
- Cost per serving: ~$0.30 per cookie
- Calories: ~160 per cookie
- Dietary Notes: Contains gluten, dairy, eggs. Adaptable for dairy-free (see Variations).
(Photo above: Overhead shot of a cooling rack stacked with golden-brown Biscoff oatmeal cookies, some broken open to show the soft interior and specks of crushed cookie pieces, a small bowl of Biscoff spread next to the stack. Morning light from the left catches the crinkled edges.)
Why These Cookies Stay Soft in the Center and Crisp at the Edges
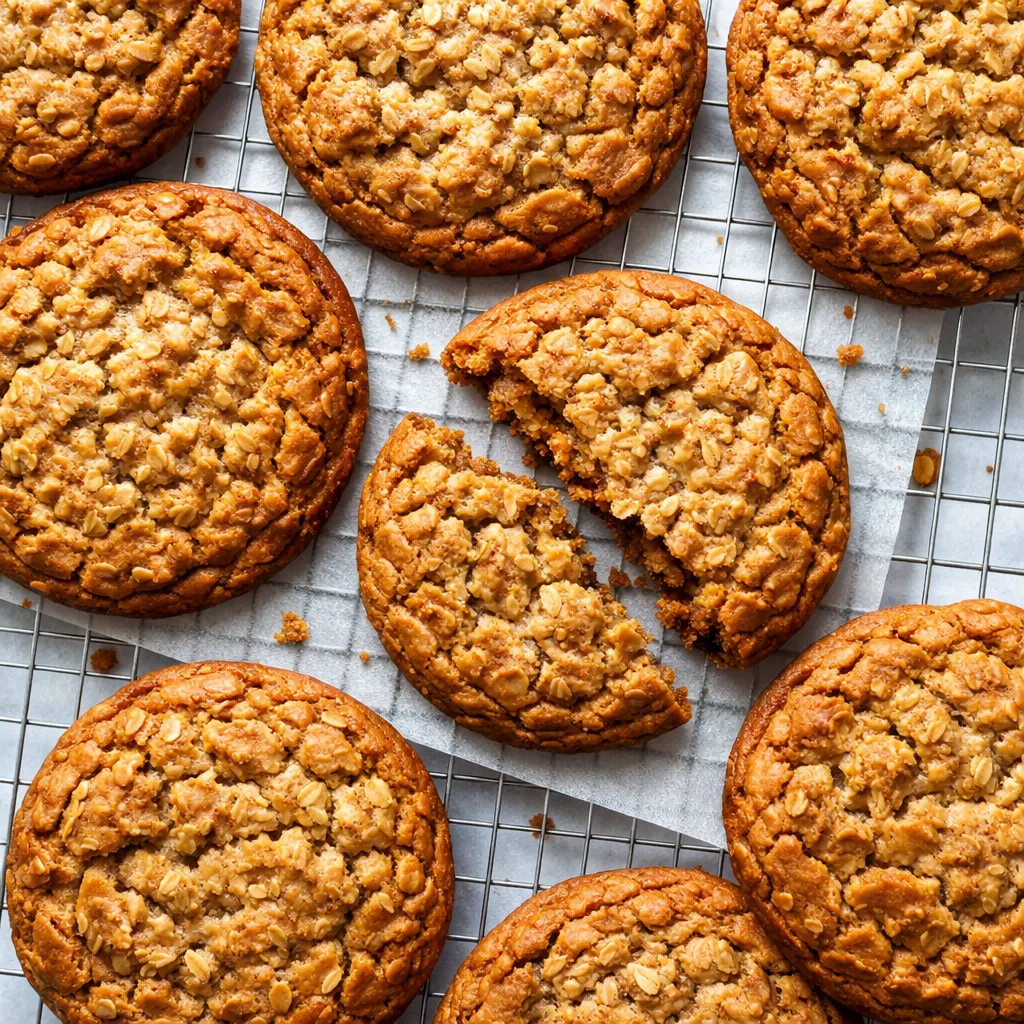
The secret is a combination of melted butter and an extra egg yolk. Melted butter coats the flour differently than cold butter, creating a chewier texture that stays tender for days. The extra yolk adds fat and emulsifiers, which keep the centers from drying out.
The second trick? I use a mix of rolled oats and crushed Biscoff cookies. The oats give structure and a toothsome chew, while the crushed cookies melt into little pockets of caramelized sweetness. You get that iconic Biscoff flavor in every single bite — not just from the spread, but from the actual cookies baked right in.
Skipping the chilling step (yes, you can skip it!) means the cookies spread a little more, giving you that perfect thin-and-chewy hybrid. If you prefer thicker cookies, chill the dough for 30 minutes — but for a 30-minute total time, this version works beautifully.
Ingredients Worth Talking About
- 1 cup (2 sticks) unsalted butter: Melted and slightly cooled. Melted butter is key for that chewy texture — no creaming needed. I use salted butter in a pinch and just skip the added salt. My kids never notice the difference.
- 1 cup packed brown sugar: Light or dark — dark gives a deeper molasses note that plays beautifully with the spice. I tested this with both, and dark won by a landslide in our house.
- ½ cup granulated sugar: For the crisp edges. Don’t skip it — the combo of brown and white is what gives you that crackly top.
- 1 large egg + 1 egg yolk: The yolk is the hero here. It’s what keeps the centers soft even on day three. Trust me on this one — I once forgot the yolk and the cookies came out like hockey pucks.
- 1 teaspoon vanilla extract: Pure, not imitation. It rounds out the spice.
- ¾ cup creamy Biscoff spread (cookie butter): The star of the show. Stir it well before measuring. Don’t use the crunchy version here — it throws off the texture. Save that for topping toast.
- 1½ cups all-purpose flour: Spoon and level — don’t scoop straight from the bag or you’ll get dry cookies.
- ½ teaspoon baking soda: For spread and rise.
- ½ teaspoon salt: If using unsalted butter. If salted, reduce to ¼ teaspoon.
- 2 cups old-fashioned rolled oats: Not quick oats — they turn to mush. Rolled oats give you that satisfying chew. My youngest says these are “oatmeal cookies for people who don’t like oatmeal cookies.” High praise from a nine-year-old.
- ½ cup crushed Biscoff cookies (about 6-8 cookies): You can crush them in a bag with a rolling pin or just chop them roughly. The irregular pieces are what you want.
The Setup (It’s Minimal, I Promise)
- Large mixing bowl (I use a glass one — the batter warms it up nicely)
- Whisk and rubber spatula
- Cookie scoop (2-tablespoon size) or two spoons
- Baking sheets — two if you can fit them in the oven. Line with parchment paper (not wax paper — that’ll smoke).
- Optional: Stand mixer with paddle attachment if you want to go faster, but a bowl and spatula work just fine.
I don’t bother with a mixer for these — the melted butter and sugars mix easily by hand, and less cleanup means I’m eating cookies sooner.
Let’s Make Them (Step by Step — No Fancy Skills Required)
This goes fast, so read through once before you start. Trust me, you don’t want to be hunting for the crushed cookies while the butter is cooling.
Preheat and Prep: Preheat oven to 350°F. Line two baking sheets with parchment paper.
- Mix the wet ingredients: In a large bowl, whisk together the melted butter, brown sugar, and granulated sugar until smooth — about 30 seconds. Add the egg and egg yolk, vanilla, and Biscoff spread. Whisk until fully combined and slightly thickened, about 1 minute. The mixture should look like thin caramel.
- Combine the dry: In a separate bowl, whisk the flour, baking soda, and salt. Add to the wet mixture and fold with a rubber spatula until just combined — a few streaks of flour are okay. Overmixing will make the cookies tough.
- Add the oats and crushed cookies: Fold in the rolled oats and crushed Biscoff cookies until evenly distributed. The dough will be thick and a little sticky — that’s exactly right.
- Scoop and shape: Using a 2-tablespoon cookie scoop (or two spoons), drop rounded balls of dough onto the prepared baking sheets, spacing them about 2 inches apart. I usually get 12 per sheet. (📸 Photo tip: The dough balls should look rough on the surface — that helps create those craggy edges as they bake.)
- Bake: Bake one sheet at a time on the center rack for 10-12 minutes, or until the edges are golden brown and the centers look just set and slightly underdone — they’ll continue baking on the hot pan. My oven runs hot, so I check at 9 minutes. Every oven is different, but that’s the visual cue: edges set, center still soft. (📸 Photo tip: The cookies should have spread and the tops should be cracked and glossy — that’s the Biscoff spread doing its magic.)
- Cool on the pan: Let the cookies rest on the baking sheet for 5 minutes. This is crucial — they’re too fragile to move right out of the oven. After 5 minutes, transfer to a wire rack to cool completely. Or eat one warm — I won’t judge.
How I Meal Prep These for the Week
I make a double batch on Sundays and we’re set for school lunches and after-school snacks until Wednesday. The trick? Scoop the dough into balls and freeze them on a tray before transferring to a zip-top bag. Then I can bake 2-3 fresh cookies anytime — just add 2 minutes to the bake time.
- Fridge: Store baked cookies in an airtight container at room temperature for up to 5 days. Place a slice of bread in the container to keep them soft — replace the bread every other day. My mother-in-law taught me that trick and it works like a charm.
- Freezer: Yes, both baked and unbaked. Baked cookies freeze well for up to 3 months — thaw at room temperature or pop in the microwave for 10 seconds. Unbaked dough balls can be frozen for up to 3 months; bake from frozen, adding 2-3 minutes.
- Reheat: Microwave for 10-12 seconds for that just-baked warmth. Oven at 300°F for 5 minutes if you want the edges crisp again. The microwave works better for the soft center — trust me on this one.
Things I Wish I’d Known the First Time
- Don’t overbake them — even if you think they’re not done: The cookies will look underdone in the center when you pull them out. That’s exactly what you want. They’ll set up as they cool on the pan. Overbaking gives you dry, crumbly cookies. I’ve done it — more than once.
- Use a cookie scoop for even sizing: It makes a huge difference in bake time. When the cookies are all the same size, they all finish at the same time. No more rotating pans or pulling out a burnt batch. My husband thinks I’m extra for having three different scoop sizes, but he never complains when the cookies are perfect.
- Let them rest the full 5 minutes on the pan: I know it’s hard when the kitchen smells like caramel and spice, but moving them too early will cause them to fall apart. Set a timer. Walk away. The reward is worth it.
- If your cookies spread too much, chill the dough: This version uses melted butter which naturally spreads more. If you want thicker cookies, scoop the dough and refrigerate the balls for 20-30 minutes before baking. Even if you mess this part up, they’ll still taste amazing — I’ve sent spread-out cookies to neighbors and they begged for more.
Swaps That Actually Work (For When You’re Out of Something)
- Dairy-Free: Use vegan butter (I like Miyoko’s) or melted coconut oil. The cookies will be slightly less tender but still delicious. I make this version for my friend’s son who’s lactose intolerant — he gobbles them up.
- Gluten-Free: Substitute the all-purpose flour with a 1:1 gluten-free baking blend (like Bob’s Red Mill). Also swap the rolled oats for certified gluten-free oats. The texture will be a little more delicate, so handle them gently when moving off the pan.
- Kid-Friendly (Less Spice): If your kids find Biscoff too spiced, reduce the amount of spread to ½ cup and add an extra tablespoon of brown sugar. Or make a batch with just peanut butter instead of Biscoff — the method is the same!
- Fancy Guest Version: Drizzle the cooled cookies with melted white chocolate and a pinch of flaky sea salt. It’s the kind of thing that makes people think you spent hours — but it takes 2 minutes.
- In a Pinch — No Biscoff Spread: You can use any cookie butter (Speculoos) or even Nutella. The flavor will change but the texture will still be amazing. I’ve done this when I ran out and the cookies disappeared just as fast.
Questions I Get About These Cookies All the Time
Q: Why did my cookies turn out flat and greasy?
A: Ugh, I’ve been there. The most common culprit is melted butter that’s too warm — it should be cooled to room temperature before mixing. Also, make sure you’re measuring the flour correctly (spoon and level, don’t scoop). If the dough feels thin, pop it in the fridge for 15 minutes before baking. You’ve got this next time.
Q: Can I use crunchy Biscoff spread instead of creamy?
A: I wouldn’t recommend it for the dough — the crunchy bits throw off the balance and can make the cookies dry. But you can absolutely press a few crushed Biscoff cookies on top before baking for extra crunch. That’s my daughter’s favorite hack.
Q: How long do these cookies last? Can I freeze them?
A: At room temperature in an airtight container, they stay soft for 5 days (that bread slice trick helps). In the freezer, baked cookies last 3 months — just thaw for 15 minutes or microwave for 10 seconds. I always freeze a dozen for unexpected guests. Pro tip: wrap each cookie individually in plastic wrap before freezing to prevent them from sticking together.
Q: What do you serve with these cookies?
A: A cold glass of milk is the classic, but they’re also incredible with coffee — specifically a latte or cappuccino. My husband dips them in his morning coffee, and I’ve been known to crumble one over dessert. My kids love them with a glass of chocolate milk after school.
More Recipes My Family Makes on Repeat
If you liked these Biscoff oatmeal cookies, here are a few others that get the same reaction at our table:
- Chewy Brown Butter Chocolate Chip Cookies — Brown butter makes everything better, and these cookies stay soft for a week (if they last that long).
- Oatmeal Cranberry White Chocolate Cookies — Tart cranberries balance the sweet white chocolate — a holiday favorite that works year-round.
- 5-Ingredient Peanut Butter Cookies — The easiest cookie you’ll ever make, and my kids can almost make them themselves.
These cookies have become our family’s go-to for everything from school lunches to neighbor gifts. I hope they become yours too.
If you try them, drop a comment below — I love hearing how it goes for you! Tag me on Pinterest or Instagram so I can see yours!
📌 Homemade Biscoff oatmeal cookie recipe that stays soft for days — save it for your next cookie swap or cozy afternoon treat.
Homemade Biscoff Oatmeal Cookies That Are Chewier Than Any Bakery Version — in 30 Minutes
Equipment
- Large Mixing Bowl
- Whisk
- Rubber spatula
- Cookie scoop (2-tablespoon)
- Baking sheets
- Parchment Paper
Ingredients
- 1 cup unsalted butter
- 1 cup packed brown sugar
- ½ cup granulated sugar
- 1 large egg
- 1 egg yolk
- 1 teaspoon vanilla extract
- ¾ cup creamy Biscoff spread
- 1½ cups all-purpose flour
- ½ teaspoon baking soda
- ½ teaspoon salt
- 2 cups old-fashioned rolled oats
- ½ cup crushed Biscoff cookies
Instructions
- Preheat oven to 350°F. Line two baking sheets with parchment paper.
- In a large bowl, whisk together the melted butter, brown sugar, and granulated sugar until smooth – about 30 seconds. Add the egg and egg yolk, vanilla, and Biscoff spread. Whisk until fully combined and slightly thickened, about 1 minute. The mixture should look like thin caramel.
- In a separate bowl, whisk the flour, baking soda, and salt. Add to the wet mixture and fold with a rubber spatula until just combined – a few streaks of flour are okay. Overmixing will make the cookies tough.
- Fold in the rolled oats and crushed Biscoff cookies until evenly distributed. The dough will be thick and a little sticky – that is exactly right.
- Using a 2-tablespoon cookie scoop (or two spoons), drop rounded balls of dough onto the prepared baking sheets, spacing them about 2 inches apart. I usually get 12 per sheet. The dough balls should look rough on the surface – that helps create those craggy edges as they bake.
- Bake one sheet at a time on the center rack for 10-12 minutes, or until the edges are golden brown and the centers look just set and slightly underdone – they will continue baking on the hot pan. Check at 9 minutes for hot ovens.
- Let the cookies rest on the baking sheet for 5 minutes. This is crucial – they are too fragile to move right out of the oven. After 5 minutes, transfer to a wire rack to cool completely. Or eat one warm – no judgment.
Notes
Related posts:
 The Slow Cooker Cowboy Casserole That Saves Tired Weeknights (No Soggy Tots Allowed)
 Lemon Garlic Butter Baked Salmon in Foil That’s Ready in 25 Minutes — No Fuss, No Mess
 Moist Chocolate Zucchini Bread That Doesn’t Turn Out Rubbery — Finally
 Creamy Homemade Strawberry Dole Whip (That Tastes Just Like the Real Thing)
 Blueberry Peach Bread That Doesn’t Sink or Turn Mushy — Finally
 Quinoa Chicken Sausage Bowls That Are Ready in 30 Minutes (And Actually Keep Well)